
 |
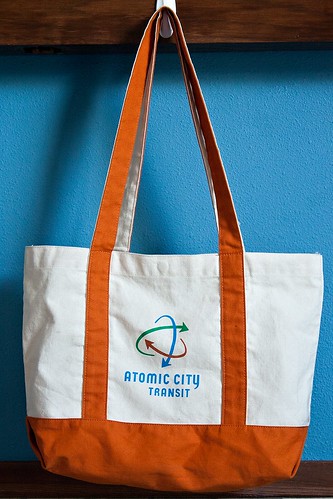
| Los Alamos, NM is "The Atomic City" |
I have wanted to make a couple more for a while, so I made a prototype last summer that I gave as a gift. I drafted this post at that time, just to have a place for my measurements and construction notes. I made another one for Mother's Day this year, so I figured it was time to post! This isn't a proper tutorial, as I lack the patience and skill for that. But the blog is better place to keep my notes than the scrap of paper I initially used (and is now long-lost!).
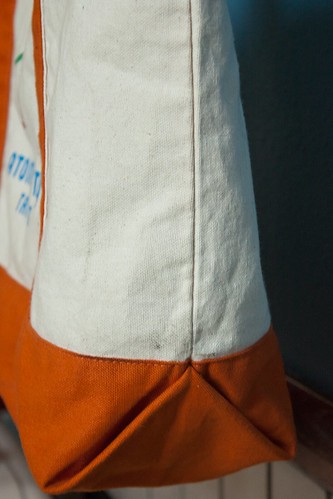
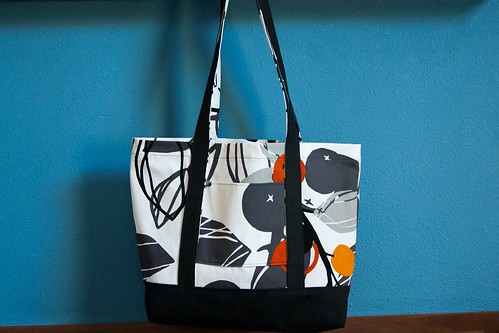
This bag is unlined and though the bottom is squared - it has the corners outside instead of having the seam on the inside. I think this probably purely cosmetic and you don't have the added step of squaring off the corners and cutting off the excess. Maybe it's a little sturdier?
I had one little snafu on my prototype - the handles should attach at the seam between the top and bottom fabrics. I forgot and had overlocked the whole bag body before I realized it. So the straps are just sewn on top of the body.

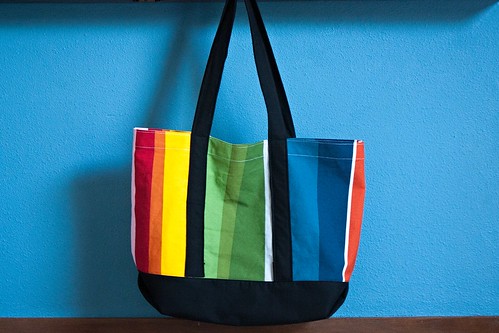
Fabric: I used home dec weight canvas from Ikea and the solids are from Hancock Fabrics. The Hancock fabric was 60" wide and quite stiff - real canvas, like for tarps. (The Ikea stuff is 50+" wide.) I pre-washed the Ikea fabric, because home dec has a little more stretch than the canvas I bought at Hancock's and I wanted to reduce that a little. I was able to make this bag with a 1/2" of the print and 1/2" of the solid. You will have left overs of the solid. (Obviously, fabric requirements are going to be different with 42-45" width fabrics.)
Cutting fabric:
Main body fabric: 2@13"x21"
Bottom fabric: 1@13"x21"
Straps: 4@2""x51" (if you cut 2 from the main body and 2 from the solid, you will be able to stay within the 1/2 yard fabric requirements. If you want your straps to be just the solid fabric, you may have to join strips to make 51" - alternatively, you could shorten the straps.)
Prepare straps: Sew 2 strips right-sides together on the 51" side (1/4" seam). On the wrong side, fold the straps in 1/4" on raw 51" sides. Press, wrong-sides together. Topstitch along both long sides. (Leave short ends raw, they will be sewn into the seams.) Straps should finish at 1.5"x51". Set aside.
On the main body fabric fold down one of the 21" sides a quarter of an inch and press. Fold again 1.25". Sew across the quarter inch fold and top stitch at the top edge fold. Repeat for second main body panel.
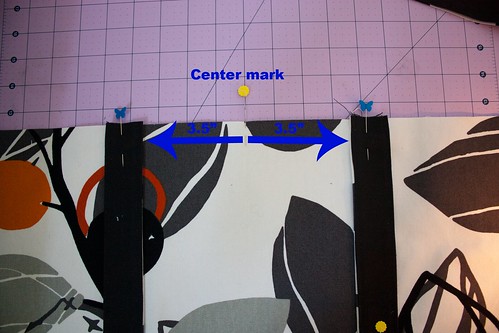
Attach straps to main fabric. Find the middle of both of the 21" sides of the main body panels. Measure 3.5" to the left and mark with a pin. Measure 3.5" to the right and mark with a pin or fabric pen. Do this for both long sides on both main fabric panels.
Line the short ends of the straps up with the unfinished 21" edge of the main body panel at the pins marking the 3.5" points. Pin in place. Pin at the finished edge of the main fabric panel 3.5" away from the center mark. Repeat for the other side and other panel. Make sure your straps aren't twisted.
Attach the straps to the main fabric panels by sewing up from the unfinished edge, across the top of the finished hem at the top and back down to the unfinished edge. (That edge will be sew into the seam and overlocked/zig-zagged.) Repeat. You can go back and topstitch a rectangle and X at the finished edge of the main body for added strength.
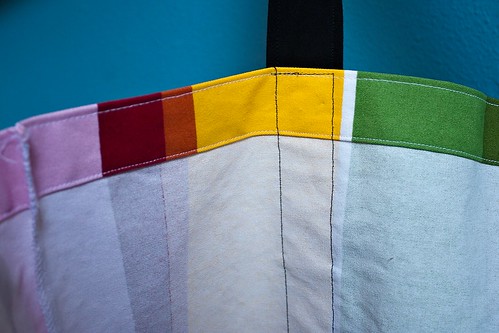
Sew one main body panel to the bottom fabric along the unfinished 21" edge, right sides together. (1/2"-3/8" seam) Be sure to catch the straps. Repeat with the second panel. Overlock or zigzag the seams. Press seams towards the bottom fabric.
Topstitch along the bottom fabric, catching the seam in the stitches. Now you have one big rectangle with a main panel (and strap), the bottom fabric panel, and the other main panel (and strap).
Finishing the bag. Fold the rectangle right sides together, making sure your straps and top hem match up.
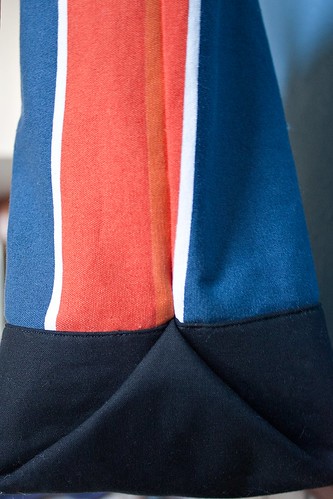
I don't have a good photo or a good explanation of doing the exposed sides. This is the best I can do. With right sides together, before you sew up the sides, push the bottom fold up into the bag so that the fold is parallel to the seam connecting main body and bottom panels. Pin in place. The bottom fabric will now make an upside down U (an "n"?) at the side seams. You will now be sewing through four layers of fabric at the side seam. Then sew up the side seams and overlock/zigzag.
Give it a good press and you're done!
This is why I don't do tutorials - those are a lot of notes for what is a simple fast project. Great for the farmer's market or the beach, too!
Optional pocket. The original doesn't have a pocket, but I added one to my Mother's Day gift with the leftovers. I believe the rectangle was 18" x 12.5". I folded the rectangle, right-sides together, matching up the 12.5" sides (now the rectangle should be 9 x 12.5"). I sewed along the raw 12.5" side using a 1/4" seam. Turned the tube right-side out. Pressed and top stitched along the folded edge. Before attaching the straps, I pinned the pocket rectangle to the main bag panel, in between where the straps would be placed. Then sewed across the bottom of the pocket. The 9" raw sides of the pocket were then encased when I attached the straps.
1 comment:
Great bag Taya. I always forget to take a bag when I go to Target - maybe if I go to the effort of making one I'll rememember!
Post a Comment