Pages

Thursday, June 28, 2012

Memory/Concentration/I Spy Game


       IMG_3824

I made my 2 year old nephew a memory game and am including the steps below. Again, this is a Type B tutorial, so probably not up to snuff of more professional/monetized blogs (this is just a sewing journal, after all). But I thought I would get my steps down here, anyway. Typically, I didn't take a photo of the finished project (classic me) but you get the idea.

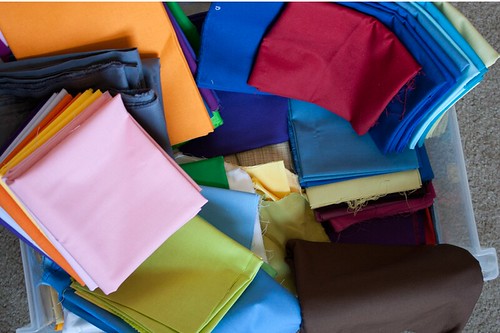
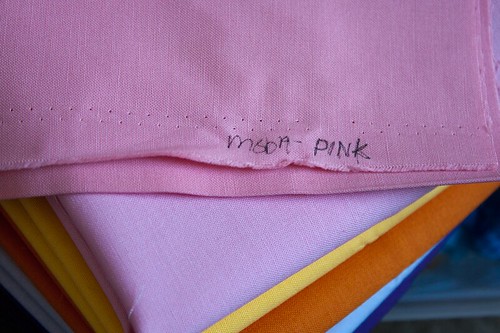
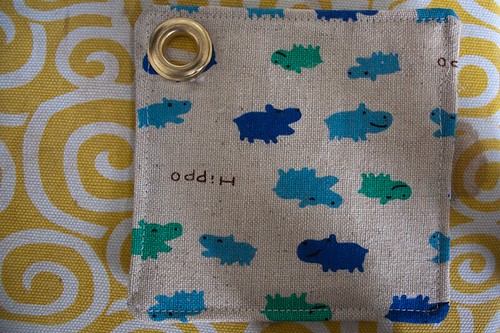
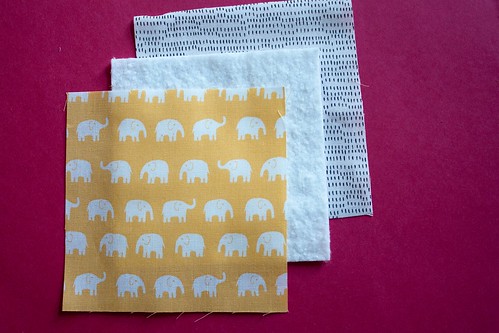
I was part of a Japanese import swap last year and I had all of these novelty type 5" squares. Some are cotton, some are linen/cotton mixes and I wasn't really sure what to do with them. Some of them were suitable for an I Spy quilt and some not. But I had two of each. So I pulled out the ones I thought would be best for a Memory game and I added to them with some of my stash. I trimmed them all to 4.5" because I thought 4" finished was just about the right size for little hands. I wanted to make them portable, so I added a grommet (super fun, gets out any aggression you might be feeling!) and would like to string them on a large binder ring (as soon as I find one!).

I made 36 (18 pairs), which is a lot, in retrospect.  But it's also a good in case you lose one or two or someone eats one, etc. 

Requirements:
IMG_3813
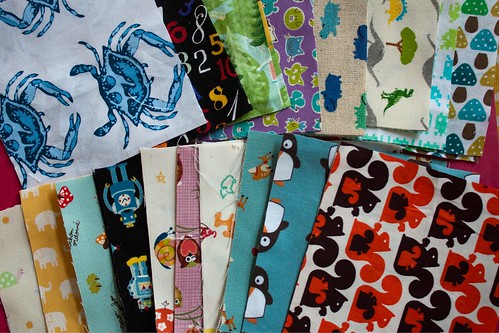
18 pairs of 4.5" squares (36 total) - could use a charm pack that has two of each print, as well.


IMG_3809 
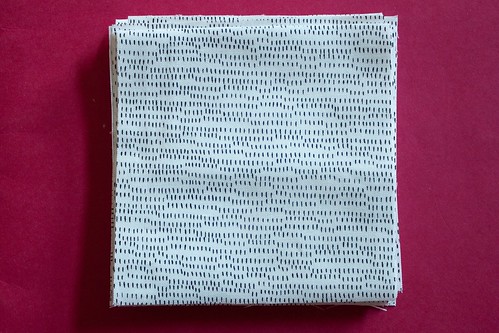
Generous 1/2 yard of fabric (you need 18" exactly for 4.5" finished blocks)

IMG_3811
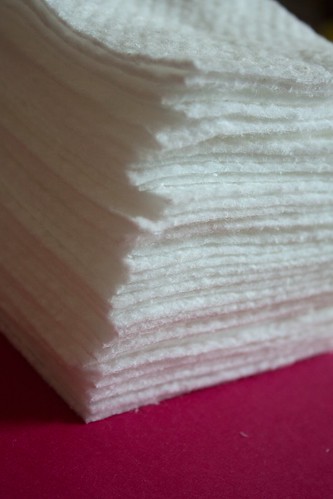
36 batting squares - I cut mine to 4.25" to cut down on bulk 
(you could cut yours to 4.5" and trim as needed)

IMG_3814 
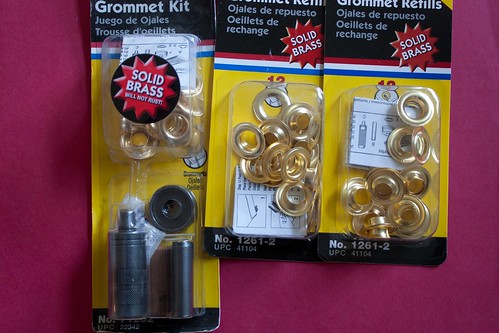
Grommets - one for each card. I got these at Home Depot, but I believe there are craft versions, too.

IMG_3815

For each card, you need one square for the front of the card, one square for the back of the card, and one square of batting.

IMG_3816

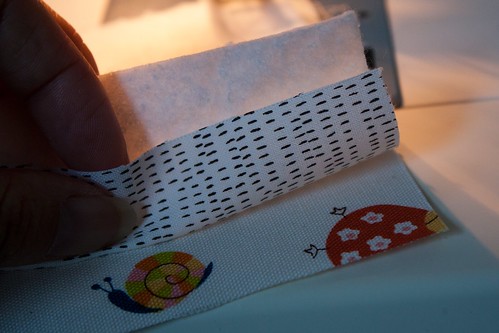
Layer the squares front square right side together with the back square, laying the batting on the wrong side of the back square.

IMG_3817


Starting in the middle of one of the sides, backstitch a couple stitches and sew around the edges 1/4" stopping 2" from where you started.  Backstitch. (If you use the smaller batting squares, try to catch the batting in the 1/4" seam.)

Try to avoid doing this:

IMG_3825

Remember - right sides together. Right side to wrong side plus batting = seam ripping!

IMG_3819


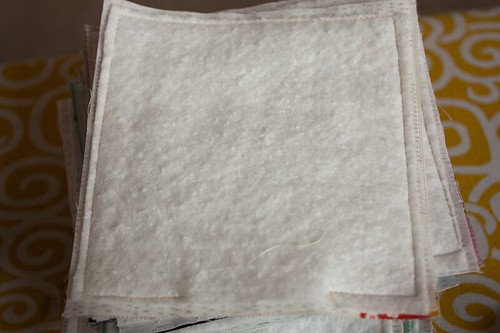
Clip the corners of the blocks/cards you've sewn properly.

IMG_3820
Using the gap left in the seam, turn the fabric right side out so that the batting is now on the inside.

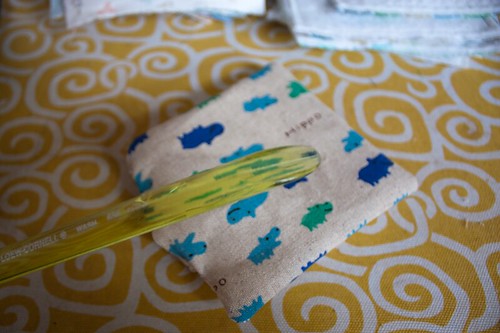
Use a chop stick, or if you're type B, a paintbrush handle to poke out the corners.

IMG_3821

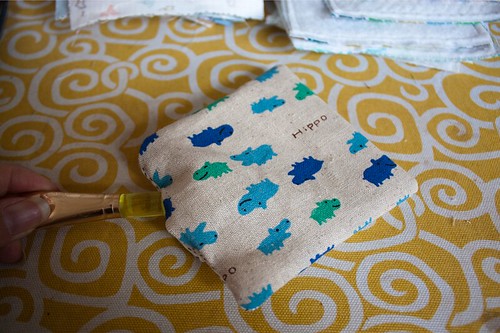
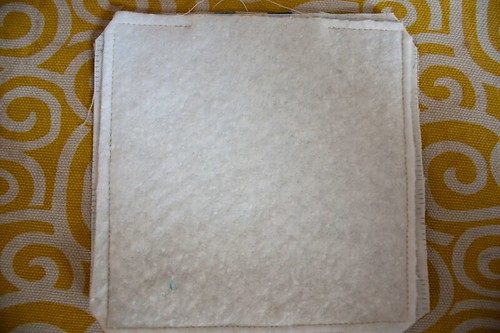
Press if desired.  Topstitch around the card.

IMG_3822 IMG_3823

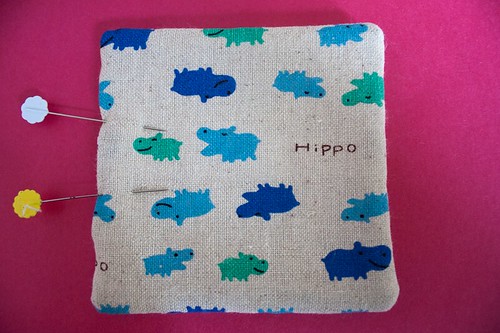
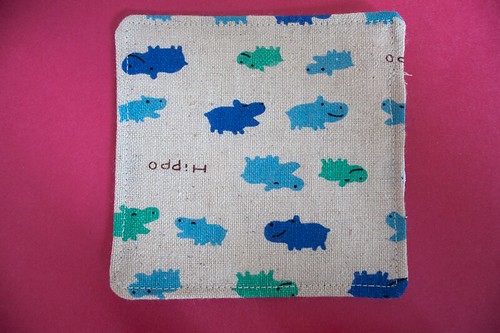
Repeat for all cards. 

Enjoy!

(optional) Adding the grommets - there is a grommet tool at Joann's but I can't vouch for it. I got my grommets and tool at Home Depot. The grommets came in packages of 12, so that worked out great for me!

There are a lot of tutorials on inserting grommets, so I won't belabor the point here. I will say that you need to cut a hole in the corner of your "cards" - you can't use the little cutter-outer tool they provide; the card will be too thick. But the cutter tool will help to mark the card.

Once you have your first grommet in, however, you'll feel really proud of yourself, so I say - go for the grommets.  You'll like it!

Playing the game
For a two year old, you might start with all of the "cards" face up and just pick out the matching pairs. Then you can turn them over and play "for real." You can also use them to play I Spy ("I spy with my little eye some robots"), either laid out on the floor or even on the ring. The ring will easily attach to a bag or purse, so it's portable!

There are other versions of the game herehere, and here.

Monday, June 25, 2012

A Little Organization

Solids organization

I saw on Fabric Donkey the other day that Venezie Designs is going out of business. I wasn't familiar with this online shop and I am not sure the story behind the store closure. But as part of closing, they are offering 50% off of all of their prices. (They are currently on vacation and doing inventory until mid-July.) I picked up about 5.5 yards of fabric - mostly Moda Bella Solids. (I also got a great Michael Miller pink zebra skin that I thought might make a fun binding for my granny squares quilt.)

Solids organization

So, the new additions coupled with the fact that I started to make my granny squares in what I thought was Charcoal, but what actually turned out to be Kona Coal, made me realize I needed to do some organization with my solids.

Julie of Jaybird Quilts did some guest posting on the Robert Kaufman blog - Swatch and Stitch - a while ago and she had a great tip: to label the selvages of your solids with the color. This would have helped me get the right color for my granny squares and I thought maybe some other folks would think it was helpful too!

Solids organization

I usually do this for the colors, but I almost never do it for the neutrals, but I clearly need to. So, that's what I'm doing this afternoon (well, that and the grocery shopping - but let's get our priorities clear!).

Also - I finished my first Ice Cream Dress from the Oliver+s pattern and I am really happy with it! I would love to show it to you... Only, I was sewing the button on in the car on the way to the recipient's birthday party and I neglected to take a photo. I do that all the time :) I have a second one cut out and will try again. My V points were not good, I might omit them this time until I can figure out how to fix that. Also, as usual, I marked my pattern with washable Crayola Markers and lo and behold, when I washed the dress - some of the marks remained. I didn't have time to soak and re-wash, but that's probably what I need to do in the future. And use the yellow marker :)

Monday, June 18, 2012

Los Alamos Canvas Tote

Los Alamos Tote original
Los Alamos, NM is "The Atomic City"
I have this canvas tote that I co-opted from my husband. He got it free at work several years ago. I love it and I use it all the time - at the library, the grocery store, Target, etc. It's just the right size and quite sturdy.

I have wanted to make a couple more for a while, so I made a prototype last summer that I gave as a gift. I drafted this post at that time, just to have a place for my measurements and construction notes. I made another one for Mother's Day this year, so I figured it was time to post! This isn't a proper tutorial, as I lack the patience and skill for that. But the blog is better place to keep my notes than the scrap of paper I initially used (and is now long-lost!).

Los Alamos Tote1

This bag is unlined and though the bottom is squared - it has the corners outside instead of having the seam on the inside. I think this probably purely cosmetic and you don't have the added step of squaring off the corners and cutting off the excess.  Maybe it's a little sturdier?

Los Alamos Tote original

I had one little snafu on my prototype - the handles should attach at the seam between the top and bottom fabrics. I forgot and had overlocked the whole bag body before I realized it. So the straps are just sewn on top of the body.

Los Alamos Tote1

Fabric: I used home dec weight canvas from Ikea and the solids are from Hancock Fabrics. The Hancock fabric was 60" wide and quite stiff - real canvas, like for tarps. (The Ikea stuff is 50+" wide.) I pre-washed the Ikea fabric, because home dec has a little more stretch than the canvas I bought at Hancock's and I wanted to reduce that a little. I was able to make this bag with a 1/2" of the print and 1/2" of the solid. You will have left overs of the solid.  (Obviously, fabric requirements are going to be different with 42-45" width fabrics.)

Cutting fabric:
Main body fabric: 2@13"x21"
Bottom fabric: 1@13"x21"
Straps: 4@2""x51" (if you cut 2 from the main body and 2 from the solid, you will be able to stay within the 1/2 yard fabric requirements. If you want your straps to be just the solid fabric, you may have to join strips to make 51" - alternatively, you could shorten the straps.)

Prepare straps: Sew 2 strips right-sides together on the 51" side (1/4" seam). On the wrong side, fold the straps in 1/4" on raw 51" sides. Press, wrong-sides together. Topstitch along both long sides.  (Leave short ends raw, they will be sewn into the seams.) Straps should finish at 1.5"x51". Set aside.

On the main body fabric fold down one of the 21" sides a quarter of an inch and press. Fold again 1.25". Sew across the quarter inch fold and top stitch at the top edge fold. Repeat for second main body panel.

Los Alamos Tote1


Attach straps to main fabric. Find the middle of both of the 21" sides of the main body panels. Measure 3.5" to the left and mark with a pin. Measure 3.5" to the right and mark with a pin or fabric pen. Do this for both long sides on both main fabric panels.

Line the short ends of the straps up with the unfinished 21" edge of the main body panel at the pins marking the 3.5" points. Pin in place. Pin at the finished edge of the main fabric panel 3.5" away from the center mark. Repeat for the other side and other panel. Make sure your straps aren't twisted.

Attach the straps to the main fabric panels by sewing up from the unfinished edge, across the top of the finished hem at the top and back down to the unfinished edge. (That edge will be sew into the seam and overlocked/zig-zagged.) Repeat. You can go back and topstitch a rectangle and X at the finished edge of the main body for added strength.

Los Alamos Tote

Sew one main body panel to the bottom fabric along the unfinished 21" edge, right sides together.  (1/2"-3/8" seam) Be sure to catch the straps. Repeat with the second panel. Overlock or zigzag the seams. Press seams towards the bottom fabric.

Topstitch along the bottom fabric, catching the seam in the stitches. Now you have one big rectangle with a main panel (and strap), the bottom fabric panel, and the other main panel (and strap).

Finishing the bag. Fold the rectangle right sides together, making sure your straps and top hem match up.

I don't have a good photo or a good explanation of doing the exposed sides. This is the best I can do. With right sides together, before you sew up the sides, push the bottom fold up into the bag so that the fold is parallel to the seam connecting main body and bottom panels. Pin in place. The bottom fabric will now make an upside down U (an "n"?) at the side seams. You will now be sewing through four layers of fabric at the side seam. Then sew up the side seams and overlock/zigzag.

Los Alamos Tote1

Give it a good press and you're done!

This is why I don't do tutorials - those are a lot of notes for what is a simple fast project. Great for the farmer's market or the beach, too!

Los Alamos Tote


Optional pocket. The original doesn't have a pocket, but I added one to my Mother's Day gift with the leftovers. I believe the rectangle was 18" x 12.5". I folded the rectangle, right-sides together, matching up the 12.5" sides (now the rectangle should be 9 x 12.5"). I sewed along the raw 12.5" side using a 1/4" seam. Turned the tube right-side out. Pressed and top stitched along the folded edge. Before attaching the straps, I pinned the pocket rectangle to the main bag panel, in between where the straps would be placed. Then sewed across the bottom of the pocket. The 9" raw sides of the pocket were then encased when I attached the straps.

Saturday, June 16, 2012

Ladies Who Lunch

Lunchbags

I was on the road last week, so I didn't do any sewing. But last weekend I was in a sewing flurry as I rushed to get my gifts finished.

I have a canvas tote bag to share and a Concentration/Memory game. But here are just two little lunch bags I made - one for my stepmom for Mother's Day and one for my friend who asked me to make her one.

This is my second (and third) time using Ayumi's tutorial/pattern and I just love it! I do add insul-brite and my shnazzy flannel-backed vinyl tablecloth for the inside (it's a really unattractive stripe, but it was on clearance and I figured it would be just fine for the insides of lots of bags - I've already used it four times and I have A LOT left!). I am not sure if the insul-brite makes a difference, but I thought I'd just as soon add it as not.

Lunch bag

I LOVE this fabric. I think it's Timeless Treasures. I'm not sure - I'd get up and look at the selvage but I'm too lazy.

Lunchbag for R

I accidentally cut this lady's head off but my friend said she didn't mind.

Lunchbag for R

This Luna Moth fabric is so pretty! It's kind of outside my color wheelhouse, but I really love it and I knew my stepmom would like the colors, too.

Luna moth Lunchbag

Because I added the insul-brite, there is a lot of bulk at the seam between the rim fabric and the main fabric. So I didn't top stitch at that seam like I did for the other one. It was just too bulky for my machine.

I also received a package in the mail last week.  All the way from Australia!!

Mail call 

It was my Sew Mama Sew Giveaway Day winnings from Shontelle at over at England Street.

SMS Giveaway Day Loot  

Eight Whimsy fat quarters! She even sent me a little chocolate from an Adelaide chocolate institution! Thanks Shontelle - cannot wait to make the fabric into something cute!