Pages

Friday, August 29, 2014

A {Fabric} Weight on My Shoulders

Plastic bag bag

So... I bought some fabric. The giddy, pleased-as-punch euphoria has since passed, as it always does, and as I look upon my fabric empire, I feel simultaneously overwhelmed and underwhelmed. Clearly, I have a self-control issue. I'm a fabric manufacturer's dream! I also have some on pre-order that will come in next month... After being pretty good for a while, I have fallen off the wagon. And since I have not sewn much in the last two years, the purchases are completely unnecessary. What is the solution?

Stop.Buying.Fabric.

Easy. Right?

Anyway, moving has also opened my eyes the the sheer volume of what I have and how I would feel about having to move it again (I really wouldn't). I definitely have fabric that needs to be re-homed. I have a gorgeous stash of batiks (my first quilting love). And while I don't want to get rid of all of them because I'd like to try my hand at some watercolor quilts in the future, I do not need a whole 20 gallon bin full (ok, it's about half full, the other half is a sad attempt at a quilt-as-you-go braid quilt that needs fixing).

I also just have some random pieces from swaps or grab bags or odd purchases, that just aren't my favorites. I don't want to keep things that I don't really love. And while there is something to be said about working with the non-favorites to change them into useful items, I think I'd prefer to use my limited sewing time to work with fabrics that I really inspire me.

First purge attempt

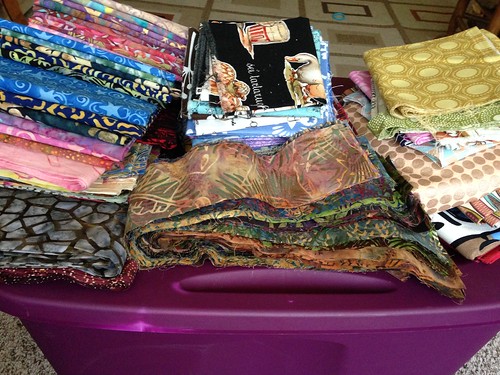
Here's the first purge. Pretty good. The batiks, minus the 48 strips are about 16 yards. So, I'd guess that's over 30 yards total there! (Barely a dent, alas....) I plan to donate to Green Bag Lady, who takes scraps 3"x18" (for handles) and up. And I'll also be sending some to Margaret's Hope Chest.

I've seen a lot of successful destashes on Instagram and I've bit the bullet and joined on the off-chance that I go that route. I don't want to open an Etsy store just to de-stash and I'm not sure how many crafters really look to ebay for fabric purchases. A lot of successful Instagram destashers are bigger-name bloggers with a legion of faithful followers. So, I don't know if that route would work well for me or not. I've looked at Faith's suggestions and Allison has a whole podcast about it, both of which are very helpful. On the other hand, I've done a bit of destashing right here on the blog, which went ok. I suppose a multi-pronged approach would work best. We'll see. Once I get the donate piles out, I'll have a better idea of what might be de-stashed. I may just decide to donate it all - less work for me and a good deed to boot!

Plastic bag bag Plastic bag bag

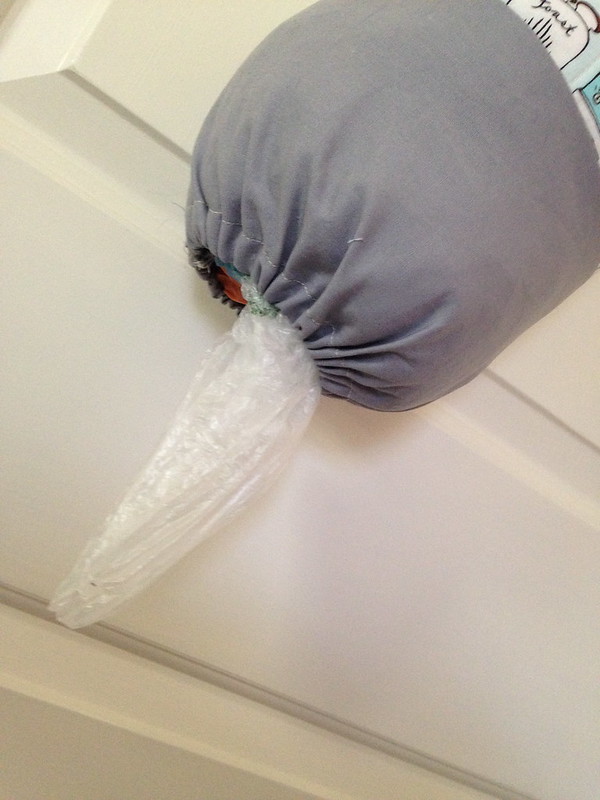
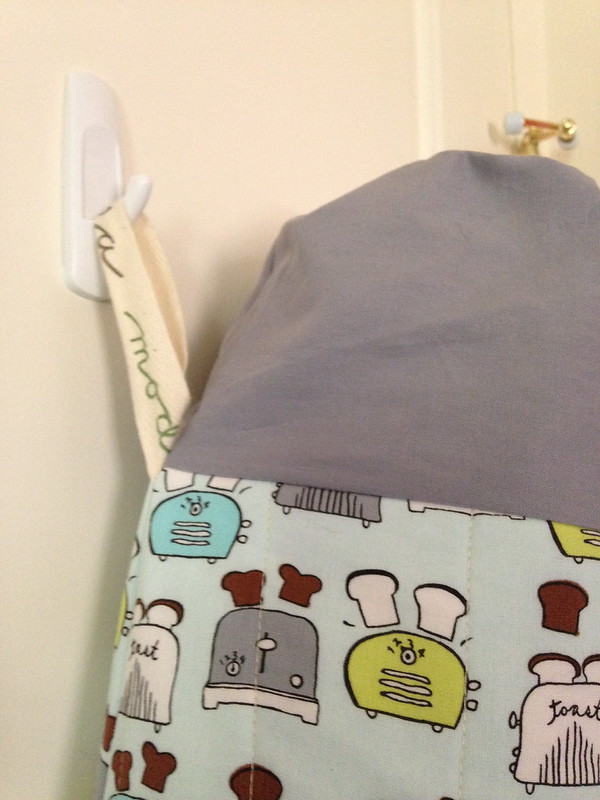
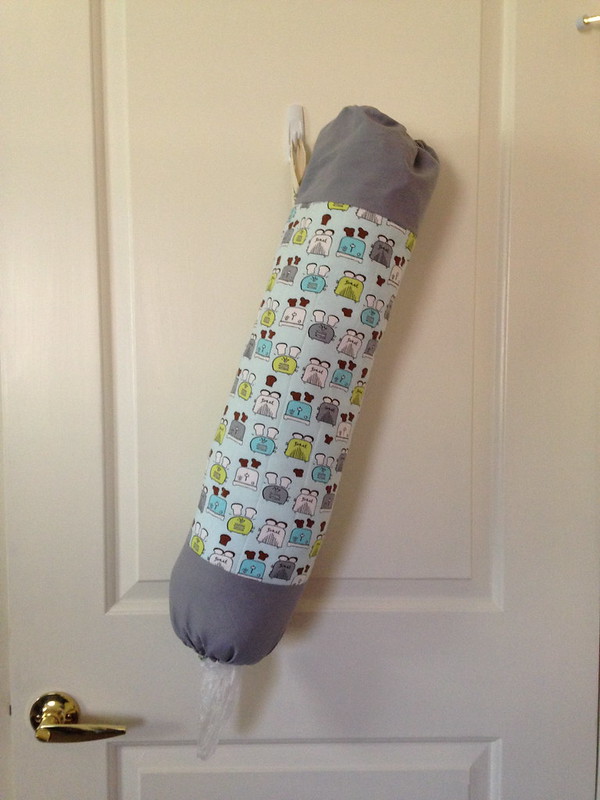
All I know is that it would take several lifetimes to get through the fabric I have with the projects that I've been doing (shark bag last week and this 1-hour wonder - the plastic bag holder - this week). The bag holder is a really fun, easy, useful project. There are a ton of tutorials out in the blog-o-sphere. I looked at Jeni's tutorial and Anne Marie's. In the end, I used what I had on hand and I think my rectangle came out to be about 19.5" x 28" before I made the tube.

It hangs in our kitchen, hence the toaster fabric. (I do tend to bring re-usable bags to the grocery store, but I still get produce bags and we also solicit from family members for dog walk bags, so we always have quite the stash of plastic bags). This is way classier than the larger plastic bag they were in!

On the design wall

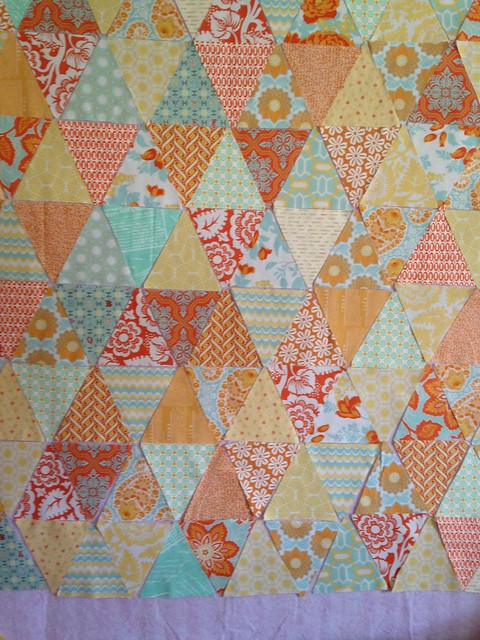
I've decided to ease back in to quilting by working on quilts that are already in blocks. That way, I can tackle some UFOs and still get some sewing in each evening. Here are my triangles on the wall (again). I've got about six or seven projects of various ages in blocks, though at least three require trimming (blech!). And I need to make a Christmas stocking before mid-September. So that should be enough to be getting on with :) I'm excited to get some of these older projects checked off the list!

Thursday, August 21, 2014

Shark Week


We are not fully unpacked, despite being at our new place for about three weeks. Unpacking with a toddler is a much longer process than unpacking with an infant: they tend to stay where you put them!

Even though we have boxes around, I was still able to get in some sewing time (yea!). I made this little pencil case for my nephew who is turning five next week. I'm going to stuff it with some gummy fish or sharks, instead of pencils :) I used this free pattern and tutorial from Patchwork Posse. I made a couple changes just based on what I had. I used fusible fleece for the interfacing for the body of the shark and then some Pellon Craft Fuse for the fins. I don't have pinking sheers, so I went ahead and sewed the fin pieces right sides together and turned them. If I did it again, I might enlarge the fin pieces a little bit to facilitate the turning. 


The zipper was a big conundrum. Firstly, mine was a bit longer than the 7" the pattern calls for. The tutorial notes that you may have to finagle and do some hand sewing to fully install it and I had to do the same. But before I made one stitch, I sat for a long time trying to figure out how to get it in. And then when I started, it was a bit of a mess. If I make another one, I think I will try to insert the zipper first, the way you would make a simple, rectangular zippered pouch.


I also got started on my Washi muslin. I've had the pattern for a while and the fabric, but neither the time nor space to get things rolling. I found this Lisette cotton lawn at Joann's on the 50% off Red Tag shelves, so it was only about $2.50. Perfect for a (possibly) wearable muslin. And it if doesn't work out to be wearable, I'll just cut it up and make something for my daughter.


I did make a muslin of the bodice first because I thought I would probably have to add an inch or so, as other people have done. I also thought that the darts hit a bit high for me. Unfortunately, since I am not great at sewing garments, I over-corrected. I added two inches to the bodice length and I moved the darts about an inch and a half down. Now everything is a bit too low. Live and learn.


In the next incarnation, the darts will have to go up a bit and I think adding that one inch to the bodice would be sufficient. I used Megan Nielsen's tutorial on moving the dart and aside from moving them too far, it was pretty easy to to do. Because this is a white print, I have a very thin layer of white voile underlining the pieces. The neckline and hem are not finished, yet. But I managed to do the arm holes. Because I underlined and this is a test garment, I thought I would use the opportunity to practice my bias binding skills and bind the arms and neckline with bias tape. My husband gave me a bias tape maker for my birthday. I gave it a whirl and I like it so far. I think it pays to take time to starch the seams and really prep the strips. But it's really nice to be able to make 100% cotton binding (instead of the cotton/poly mix from the pre-packaged Wright bindings). This lawn is pretty stretchy on the bias, so a little starch might have been helpful. Again, this has been a pretty good project to learn on.

I tend to shy away from making clothes for myself because fit is so important for adults. Kids can use room to grow and change. But it's such a crapshoot each time I start a project for me and then, even if I take the time to make a muslin, it's not a guarantee of success. In the time it takes to trouble-shoot fitting issues with a muslin and then produce an actual piece of clothing, I could have quite a few blocks made or even a whole quilt. So, I never get in the practice and experience you need to become a decent garment maker. Oh well. My beautiful lawns will have to wait.

I'm so happy to have a little space to create, again. It is in no way organized, yet (especially since we haven't fully unpacked), but after dumping everything out, there's just enough room for me to actually make something.