Pages

Wednesday, August 31, 2011

TwitterB-September-Me!

September TwitterB

Finally back to quilting. I've been working pretty diligently on my Project Modern entry and getting psyched for my TwitterB month. This post is for my fellow TwitterB-ers!

TwitterB-September

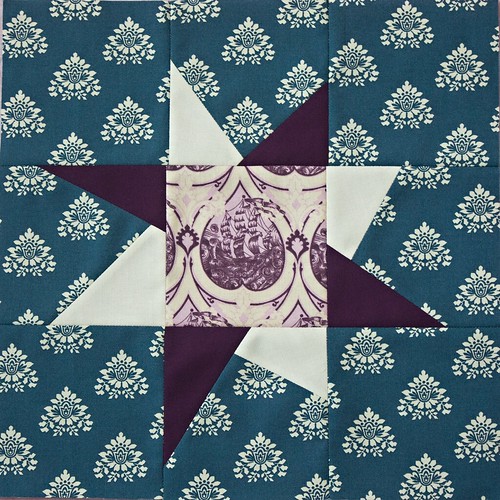
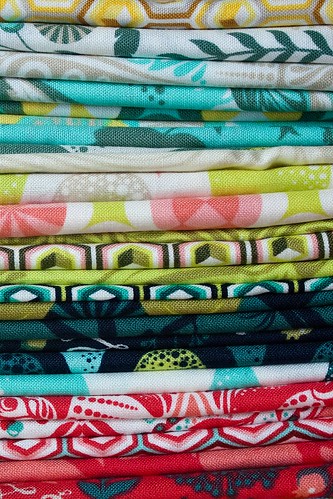
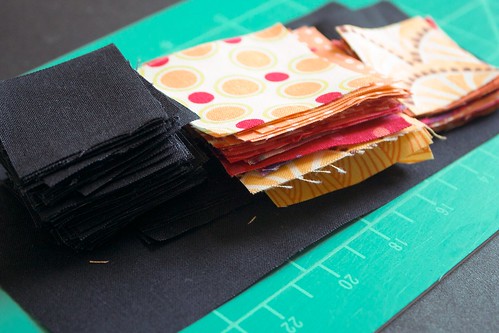
As the saying goes, great minds think alike and for Molly and me that means Wonky Stars. So, if it feels like deja vu all over again, it is :) I'm asking for 12.5" unfinished blocks red/orange/yellow stars in a Kona Pepper background.

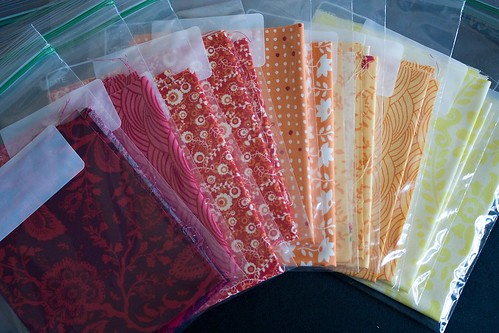
I've used Pepper in a number of projects, but I've been having trouble photographing it, so I thought I'd post the difference between Black and Pepper from Robert Kaufman's website.


The Pepper is a slightly bluer, muted black and just a softer look overall. I think the Pepper makes a nice night sky for the Wonky stars.

TwitterB-September

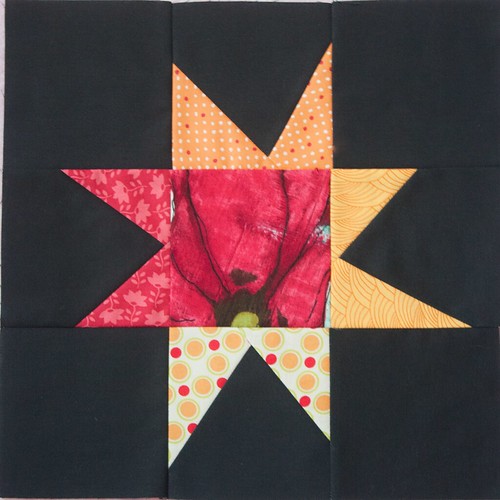
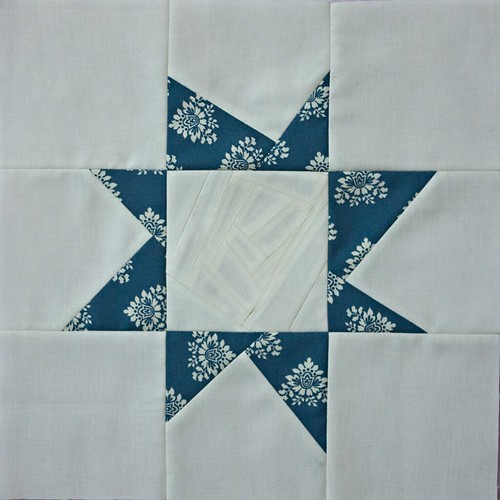
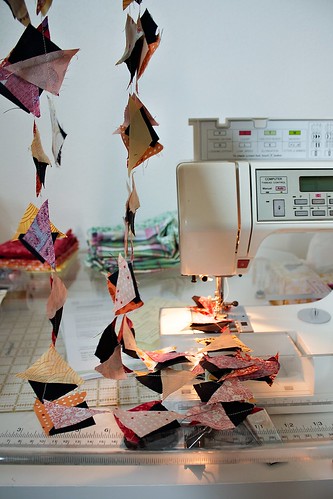
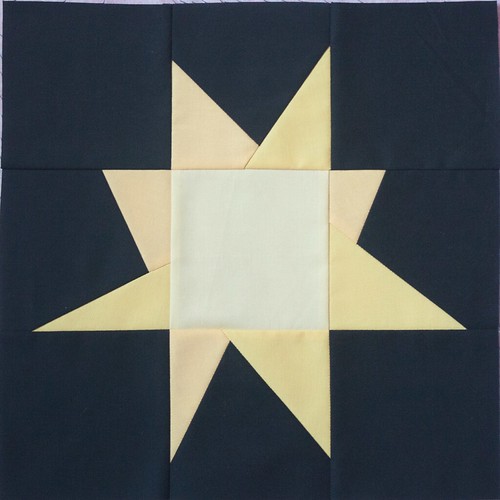
I got a bit over-eager and put some sample blocks together in early August during a hiatus from birthday present-making as examples for other TwitterB-ers. The two above are the basic 12.5" blocks based on the Wonky Star Block tutorial from The Silly Boo Dilly blog. She has a note about cutting the star point squares a little larger to create more dramatic points. I cut my squares for the star points 1/2" larger (so, for a finished 4.5" block, I cut the star point fabrics to 5"), but I don't know that it is really necessary. It's something you can play around with. You can probably get plenty of variation with 4.5" (her block is an example of that) or by using oddly-shaped scraps.

The following are a couple variations, each resulting in a 12.5" unfinished block.

This one is two 6.5" stars and two 6.5" background squares:

TwitterB-September

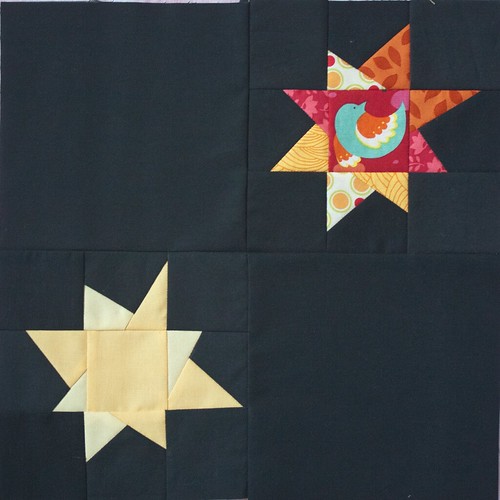
From the background:
2 - 6.5" squares
16 - 2.5" squares
For the stars:
2 - 2.5" squares (centers)
8 - 2.5" squares (or a little larger per tutorial - star points)

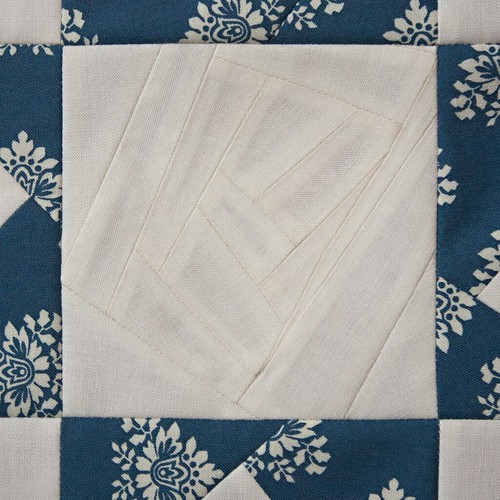
With this next one, obviously, you can place the star in the middle or somewhere on the outside:

TwitterB-September

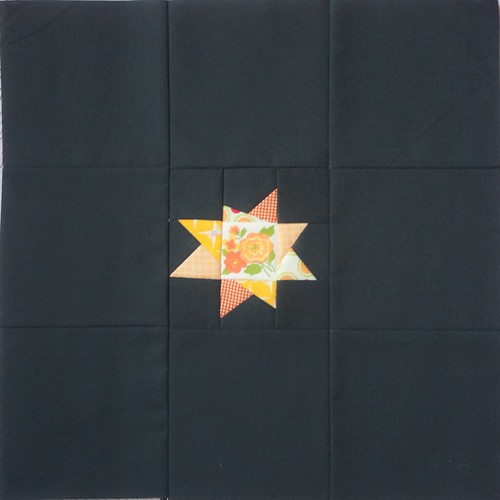
The only thing to be aware of is that the star block is going to be a little larger than 4.5" finished and you need to trim it down to 4.5", which means that when you're sewing the star points, you don't want to place your triangle too closely to the top of the background square (which creates a deeper V in the star points). There needs to be enough for 1/4" seam allowance without cutting off any points. So, a short, shallow V might work better here.

Background:
8 - 4.5" squares [or 2 - 12.5"x4.5" rectangles and 2 - 4.5" squares]
8 - 1.875" (1 7/8") squares
Stars:
1 - 1.875"
4 - 2" (points)

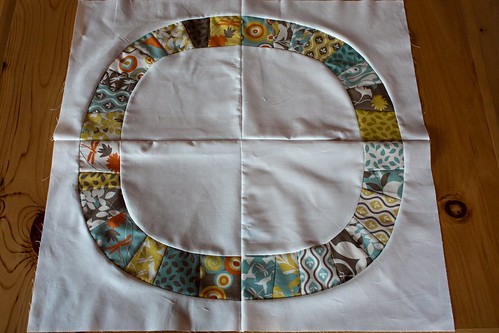
Finally, I decided to go a little crazy and try this ambitious-for-me block: Ring of Stars Block at Cut to Pieces (tutorial at the bottom of her post).

TwitterB-September

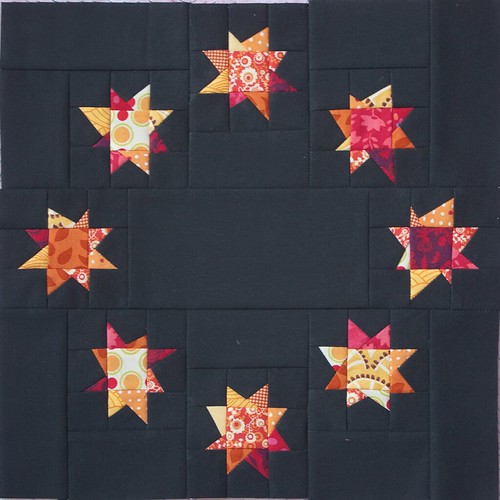
I'm happy with it, but I don't know if it will really go with the rest of the quilt. Maybe for the back... We shall see.

Thanks, TwitterB-ers!

Sunday, August 28, 2011

Gone Fishin'!

{Just want to send a brief shout out to family, friends, and everyone affected by Irene. Thoughts and prayers are with you.}

On with the regularly-scheduled photo-laden post...

Charlie's fish game

I finished up my final summer present last week for my newly-2-year old nephew.

My family is really into fishing (we are Minnesotans!) and my brother is eager to pass along the tradition to my nephew. Now that he's turning 2, I thought he'd be just the right age for this activity.

Charlie's fish game

I found many tutorials online for fishing games, but I really liked the look of this pattern from Just Another Day in Paradise. I used her template for the basic fish shape and the hooks. I had some fabric already that I wanted to use (Alfabeto Italiano), so I didn't use felt. And instead of velcro, I used magnets and washers.

Charlie's fish game

I tucked the magnets into the hooks and I sewed washers into the fish heads (roly, poly fish heads). I was a little concerned about attaching the washer to the outside of the fish (as some other tutorials described) where they might fall off easily. They are pretty small - the smallest one is smaller than a dime. So I think they are pretty safe inside the fish. I tucked the washer in the head with a little fiber fill and then sewed a curve to keep the washing in place. Then I filled the rest of the fish and made a small curve near the tail.

Charlie's fish game

My husband had some very strong rare earth magnets, so I wrapped them in a little fabric and inserted them inside the hook. Now they will catch the fish but it won't be so tight that little hands won't be able to detach fish from hook. In fact, they might be a little too weak now... but we'll see.

IMG_2347

My family has been visiting the Eastern Shore in Maryland for almost 30 years and now the next generation is enjoying it, too. Blue crabs are a big part of our visits there, so I wanted to add a couple to the fish bucket.

Charlie's fish game

I used this great, free e-book called Crab-Bags and Other Bean Beings for the template. I did not want to turn all those crab legs, so I liked that this pattern just had the two claws and two legs. I added about a quarter inch to the whole thing and closed the claws for easier cutting and sewing.

Charlie's fish game

And what's fishing without a bucket! I had a bit of a hard time getting the arc just right in order to make the cone-type shape. But I just messed around a little bit and it seemed to work out alright. My nephew's name is Charlie and I used the no-sew Heat n' Bond to iron on his name and it's also a little play on Charlie Bucket from Willy Wonka and the Chocolate Factory.

Charlie's fish game

For the fishing rods, I followed the tutorial and sewed lines in two layers of felt and then I glued them to a couple dowels I found at Menard's. This adds a nice protective padding to the ends. I used white for the handles and black ends.

Charlie's fish game

I used super glue, which ended up not being the best idea. I am not worried too much about my nephew chewing on it but it did discolor the black felt a little bit. But they're still perfectly functional.  (I used a shoelace that I was lying around for the line.)

Charlie's fish game

Live and learn and then move on!

I had a lot of fun making this. Hope Charlie has a lot of fun with it!

IMG_2360

Wednesday, August 24, 2011

TwitterB-August

August Twitter B - Block 1

Molly picked the wonky star for this month's TwitterB Block (I'm also going with the wonky star next month!). She sent us a fat quarter of this dusky blue medallion Michael Miller print. I wasn't sure what to pair with it from my stash. So, I kept it pretty simple.

I added some Kona Snow and made the block above. Here's a detail of the center block.

August TwitterB - Block 1 detail

I was going for a little texture, doing a little 4.5" improv block. I'm not sure it's as successful as I wanted it to be, but it's OK, because I aways make at least two blocks :)

This one is Kona Snow and Eggplant, paired with a little piece of Parisville.

August Twitter B - Block 2

Hopefully, Molly will like them!

It's been quiet around here, but I've actually been doing a lot of sewing, but I don't have too much to show for it quite yet. I made my nephew a present that I'll be posting about soon (his birthday party is on Sunday) and I'm trying to do some straight-line quilting (ugh!) on a quilt that I'd like to enter in Project Modern: Challenge 4. We'll see, though - I think I bit off a little more than I can chew with my little machine. Just getting 10 lines on it took a big part of my afternoon and then there's the dreaded B-word (binding).

Stay tuned...

Monday, August 15, 2011

Abundance of Birdie Slings

Birdie Sling 3

I am visiting Minnesota and I delivered the most recent birthday offerings.

My niece is the recipient of my third Birdie Sling (As an aside, after going back and forth, I broke down and bought Style Stitches with a 40% coupon from Joann's and I'm looking forward to trying a couple new AB patterns!). Here she is (the bag and the niece!) -

Birdie Sling 3 recipient

(She is wearing shorts, by the way - it's a big bag :)) I forgot to take a photo of the insides! It's a pale yellow and has a key clip, a zippered pocket, and a larger pocket with a couple slots for pens.

My brother requested Wisconsin cheese curds for his birthday, but I also made him this insulated bag:

Insulated Lunch Bag

I used the measurements from this tutorial at Sew4Home.

Insulated lunch bag-inner

Instead of using laminated cotton and PUL, as the pattern described, I used part of a vinyl, flannel-backed table cloth, Insul-Brite, and a shower curtain lining (a new, clean one, of course!). It makes for a less rigid bag, but it scrunches up nicely in a full refrigerator! I also used velcro instead of webbing and a clip, because that's what I had on hand.

I also found a home for the Pac-Man wallet!

Pac Man wallet recipient

While I was visiting the homeland, I had a little time to sew. And I pieced the two Single Girl rings I cut earlier in the week. I cut the outer pieces a little larger because I knew I was going to make the rings into pillows and didn't want to add a border after. It also gave me some room for squaring up. (I haven't ironed that center seam there...)

Single Girl Ring 1

I was really surprised at how easy the piecing was. I only needed the seam ripper a couple times. I definitely want to get started on cutting pieces for my quilt, but I really need to finish up some projects first.

I know, you've heard that before!

Tuesday, August 9, 2011

A Baby Blanket, a Saturday Surprise, and a Single Girl

Single girl templates
Single Girl templates in folded envelopes

Most of last week's sewing was dedicated to working on a birthday present and a baptism present. Since the baptism was this past Sunday, it took precedence and the long-suffering birthday present was shunted aside again.

Knit blanket

For my new goddaughter, I made this knit blanket (out of knits, not knitted - I haven't mastered that skill, yet...) with her name on it using this tutorial from Make It Love It. It was only my second time working with knits and the first time was making small burp cloths. But I found the blanket to be quite a challenge! No matter what I did, the edges stretched and stretched. I actually attached the ribbed binding,  cut the whole thing off, ripped the binding off, trimmed some of the stretched out parts and started again. And I thought it would be a quick and easy project. Silly me!

Knit Blanket detail

In the end, it was still a bit wavy. I'm not sure how to cut down on that. I used my walking foot for the binding the first time, but the second time I used my regular piecing foot and I didn't see a huge difference in stretch. Then I steamed the heck out of it, but truth be told, I couldn't see how much a difference that made. All in all, I think it's pretty cute and will be useful, though not as neat as I wish it were.

As luck would have it, I got sick right before we were to drive up to my in-laws on Saturday. While I was taking it easy, I received an email from Pete Spain. I'm sure the quilters out there recognize that surname! He said that my email address had been drawn from the folks who receive Kate Spain's newsletter and I would be receiving some of her highly-anticipated new line, Terrain! And indeed, on Monday, this is what arrived in the mail:

Surprise Package from Kate Spain

I really love her fabrics. Here are a couple projects I made this winter with her other lines:

Floral Bouquet
Verna
Central Park 9-patch
Central Park
Naked Bed Challenge3
Fandango

I was still a little bit under the weather yesterday (Monday), so instead of working on birthday presents, I started cutting out pieces for a couple Single Girl pillows. I had two partial Arcadia charm packs and it was enough to make two pillows-worth of pieces.

Single Girl pattern & templates

I know this pattern has been the subject of some blogosphere controversy, but I am firmly in the "Love it!" camp. Of course, that's me saying that before I've tried to make it... I plan to make a quilt, but I thought a couple practice pillows might be in order since curves are new to me. I might make the bed-sized one out of...

Prince Charming

Yes! My Prince {Charming} has come! Adding to the fat quarter set I received from The Fat Quarter Shop, I now have 25 of the 30 prints. I'm not going to track down the last five; I think I can supplement from my stash to get enough prints for the Single Girl. I need 31 prints to form the full ring and I think I have six that will work out.

I'm so excited to play with this fabric, but that's always the way at the beginning, right?! After the birthday bonanza, I can get back to quilting a little more. I'd like to clear a few UFOs off my list, including the one that has been hanging on my design wall for... three weeks? I just have to sew the strips together(!). Plus, I have a couple other projects languishing in blocks that I want to finish up. Maybe I should alternate between UFO and new, so that I have some finishes instead of making more UFOs!

Monday, August 1, 2011

A Little of This, A Little of That

Weekend sewing

Well, I did a bit of weekend sewing, but much of it is for my TwitterB month even though that isn't until September (I just got an idea in my head and then I got over-excited and I couldn't help myself!).

The spate of July birthdays in my family and circle of friends includes my own, so instead of showing my sewing, I thought I'd share several of the fantastic gifts I received.

Firstly, my dad and stepmom gave me this staple gun! (I do ask for the weirdest things...) It's awesome!

Birthday staple gun!

I also received a giftcard to Joann's so I ran right out and used it and I found this sunny home dec remnant to re-cover my ironing board.

Ironing board

While I was in Minnesota dropping off my gifts, I also picked up several half yard cuts of home dec fabric.

Ikea fabric

I just don't know about those faces... but I'm sure they'll make an interesting tote bag for my mom!

Shirred Ikea dress

I also found this yard remnant at Ikea (not home dec - just regular cotton) and made the beginnings of another Mendocino sundress. I have three other versions that are my summer uniform! Just have to get the straps right and then hem 'er up and she'll be good to go!

Foam Ottoman form

And finally, with a little shopping spree money I picked up this little number at Hancock Fabrics. It's a foam ottoman form (obviously, since that's what the little paper says there!). I have some sparkly red vinyl, like you might see in a diner booth or covering the stools cushions. I tried to take a photo, but my photo skills aren't great and capturing that fabric is really difficult! I may wait on this one till I can use my Juki though. I'm not sure my trusty old New Home is up to making vinyl piping.

Oh and finally (for real this time!), with another birthday gift, I was able to procure 13 more Prince Charming prints! Very excited about what might be done with them! Maybe a Garden Fence quilt or maybe I should start the Single Girl adventure...

Block pieces

Here's a peak at what I was working on. 157 pieces for 1 block to be revealed later this month!

On tap this week is whipping up a baptism gift for my goddaughter-to-be (whipping up because I may not get the fabric till Wed!) and finishing up a birthday gift for my niece. I also have to do a little brainstorming about what to make for my younger brother. Ah the conundrum of sewing for men continues.

Onward!