Pages

Sunday, December 30, 2012

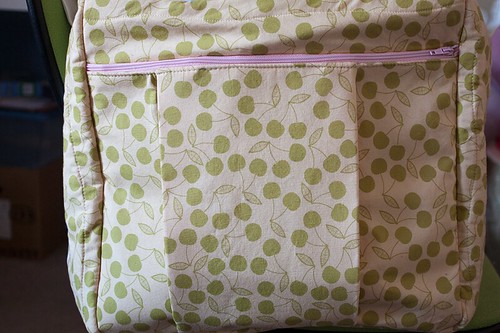
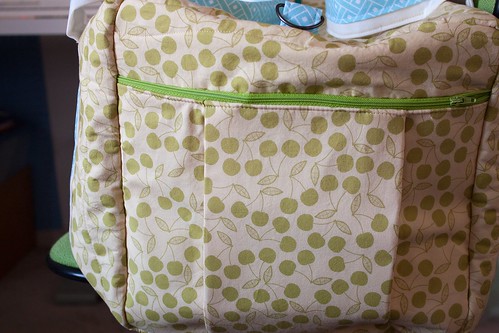
Studio Cherie Duffel - Simplicity 2247

Simplicity 2274/Studio Cherie Duffel 

[Caution! Loooong, wordy post ahead!]

As I have mentioned numerous times, I have several projects to do for the baby. Fortunately, I have a little time (knock on wood!) and I needed to get the holiday shuffle out of the way before getting to them. A while back, I got it into my head to make my hospital bag (I don't know why!). I've had the Studio Cherie duffel pattern for quite a while. You can get the pattern from Cherie at her etsy store or buy it from your local Joann's or wherever you buy Simplicity patterns (Simplicity 2274). I started about three weeks ago and let it sit over the holidays.

I had almost everything I needed in my stash. In the end, I had to buy a little bit of interfacing to finish it up, but that was it!

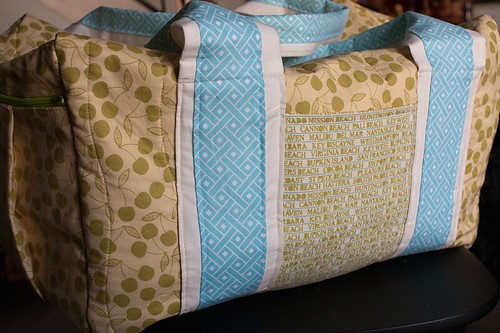
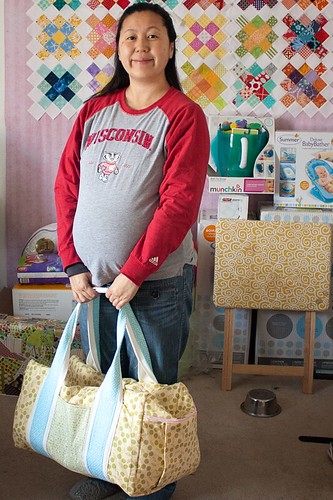
I did a lot of internet searching for reviews and tips before I started. I found the most helpful to be from knottygnomeIn Color OrderSew Chatty, and Spontaneous Threads. If you are interested in the pattern at all, definitely check out their posts and Google either "Studio Cherie duffel" or "Simplicity 2274" for other photos and a few blog posts. For what it's worth, here are my (very wordy) thoughts and alterations. Here's the finished product:

Simplicity 2274/Studio Cherie Duffel

I don't think that this is a particularly difficult bag. But like most bag construction, there are a lot of steps and there's a lot of prep work to measure, mark, and cut out each piece of fabric and then likewise with the interfacing (if you choose to use it). I think it could be done in a dedicated weekend, but splitting it up over several weekends is nice, too. Also, people note that it's a large bag. And it is - it's a duffel bag. So, it's not a purse or a tote or even a big Amy Butler style shopper. It's like a big, gym-sized duffel bag. Except a lot cuter because you're using your own precious fabric!

Pattern (generally) - All the pieces, except for the pulls used in the pattern, are rectangles. So, you can cut out the pattern pieces if you like working with those or you can just measure the rectangles and use your rotary cutter. Either way, be sure to transfer all of the markings. Being lazy, I did that for most things, but I decided to forgo it with the end pockets.
  • I cut all the quilted pieces about 2" bigger than called for, as suggested by Jeni (In Color Order).
  • I ended up doing something different for the pulls, so I didn't even need that particular pattern piece.
  • The bag is not lined and I chose not to add one. (knottygnome has some good tips if you would like to.) I did finish the edges by zigzagging them (I seem to have broken my overlock foot, but zigzagging worked out just fine). I finished the edges before I constructed the bag to avoid bulk issues. If you have a serger, this would be a great time to use it. I think it really finishes the bag nicely without using more fabric. 
  • I added another folded pocket to the back/front (the pattern calls for one). And I added another zippered  side pocket. The pattern calls for one. 
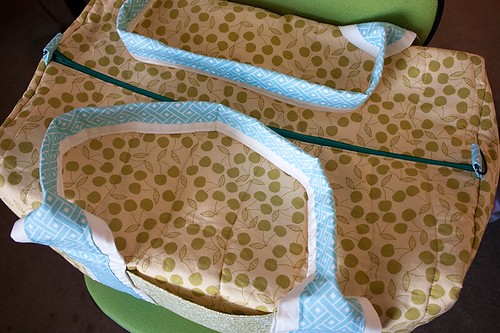
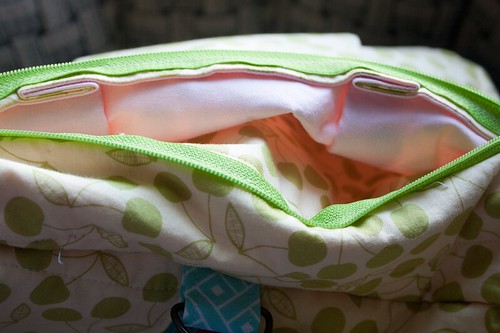
  • I top-stitched the main zipper and the zippers in the pockets.
Simplicity 2274/Studio Cherie Duffel

Fabric - Instead of having a lining, the pattern calls for printed fabric (for the outside of the bag) and "muslin" for the inside/backing. For the muslin, I used some 100% cotton pink broadcloth I had lying around. I like to have a lighter color for the inside of bags. I just think it helps to see everything inside when the bag is open. I also don't like to use anything too precious to me for the inside of bags. I might if I were making a swap bag for someone who has an appreciation for a particular fabric. But for the most part, I like to use a solid or a cotton print that isn't one of my super-favorite favorites.

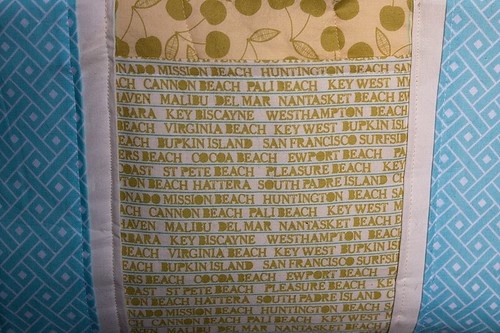
I used quilting weight cotton for the outer fabric. I've been saving these Cosmo Cricket green cherries for something special! The pattern suggests home dec weight.

This is a very bulky part to go over, since it's the main body, the facing, the zipper and the pull. Just sew slowly!

Simplicity 2274/Studio Cherie Duffel

Batting - I don't keep polyester batting on hand, which the pattern suggests to help the bag keep its shape. Instead, I fused Pellon Thermolam fusible fleece to the outer fabric and used some lightweight fusible interfacing on the muslin/inner fabric. I thought between the fleece and the interfacing that the bag would have enough body to hold its shape and mostly it does, without being too stiff.

Quilting - as noted above depending on how you are going to quilt your bag, it might be helpful to cut your front, muslin, and batting a little larger than the pattern. If you are going to quilt densely, you might need a little more wiggle room, as your pieces will shrink with tighter quilting. I did some organic lines, similar to the ones on the pattern. But I didn't mark them from the pattern.

Simplicity 2274/Studio Cherie Duffel Simplicity 2274/Studio Cherie Duffel

Pockets - I interfaced all four pockets for a little more stability. I used what I had, which was Pellon Craft-Fuse.

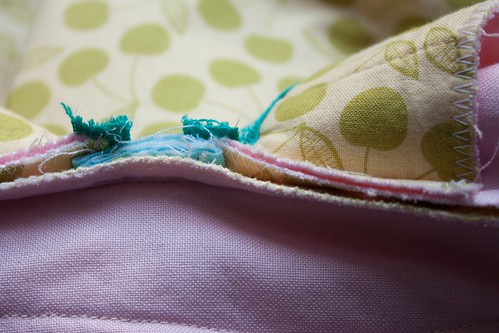
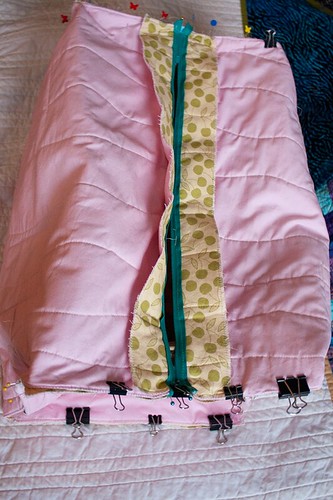
This might seem slightly convoluted (photo below), but it will make sense if you've read the pattern: If you follow the pattern the edges of the zippered pocket connected to the zipper are unfinished. So, I added 1/2" to the long edge of the zippered pocket (both outer and inner fabric) pieces. Before pleating, I interfaced the muslin and right sides together, I sewed across the long edge of both fabrics. Turned them wrong sides together, pressed and basted unfinished edges. That way, the part that is sewn to the zipper is finished and stray threads won't get stuck in the zipper. Of course, this adds bulk to the end project. If you interface the pockets, don't interface the top 3/4" (where the zipper seem will be) to cut down on as much bulk as possible.

Simplicity 2274/Studio Cherie Duffel

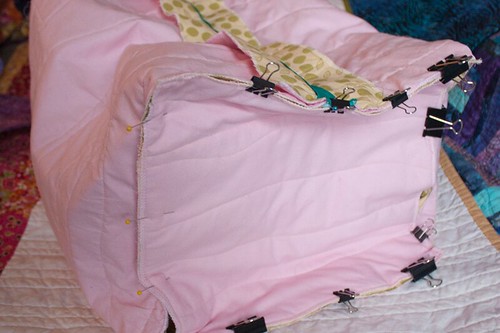
This was the most challenging part for me because my end pieces (with the zippered pockets) were just a titch bigger than the ends of the bag. But I fudged and pulled and pushed and ba-da-bing, ba-da-boom - they're in there!

Straps - The pattern calls for a base layer of jute, which is really cute and I'm sure, quite sturdy. But I didn't have any, so I followed knottygnome's ideas for the straps (cut 3 strips 8"xWOF and make to strips of 62"; sew into a tube; fuse 3.5" of fusible fleece or interfacing to each tube and turn right-side out). I made mine out of Kona Snow and a print (a Dear Stella Basketweave). You could just as easily make narrower straps or use a ribbon, webbing, or cotton tape. Just remember that you will see the inside/back of the strap at the handle, so something finished would be your best bet.

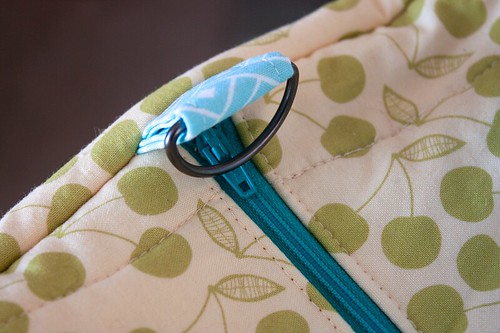
Pulls - Instead of cutting out the pulls from the pattern, I cut two pieces of 2.5"x4", fused lightweight interfacing them, pressed the edges to the center and then in half again to get a piece that was 2.5"x1". Then I added a D-ring to each. This way, I can add a shoulder strap later if I want.

Simplicity 2274/Studio Cherie Duffel

Final thoughts: Know thy machine. I actually only lost one needle in this process and it was at the very end. My machine doesn't like when I use jeans needles. It tends to skip stitches. So, I used a universal size 12 for the whole she-bang. It also does not like bulk, but it does have a setting to change the presser foot pressure, which is helpful. I previously broke my walking foot (yes, I am hard on my machine!), so I used my usual foot, which is a satin stitch foot.

Simplicity 2274/Studio Cherie Duffel

I'm really happy with this bag. And I actually have fabric to make two more! I don't need two more duffels, but they might be good gifts for someone very, very special (this isn't a bag you give to just anyone!). But after next week's last pre-baby visit to Minnesota, I have to get back to the baby projects because she'll be here in no time!

Hospital bag

Happy New Year to all! May your best sewing be yet to come!

Thursday, December 20, 2012

Just Keep Sewing, Just Keep Sewing...

Fish! 

Well, we're having a blizzard here in Madison, WI. Wish I had a snow day, but I'm a telecommuter, "so rain, sleet or snow..." (or more accurately, "morning sickness, nasty cold, or blizzard") I'm working! I'm taking a short break for shoveling this afternoon before the temperature drops and everything freezes, though!

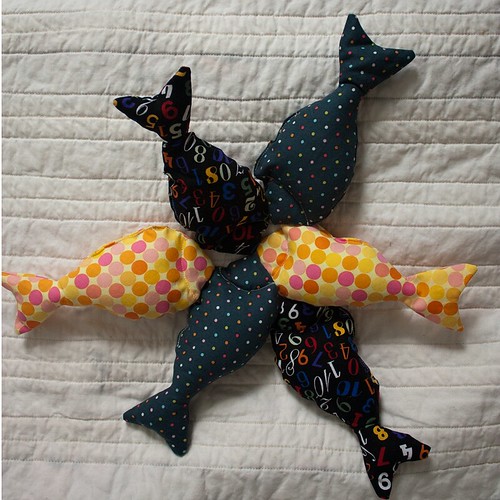
I've been working on a few projects this past month. I made up a fishing game (like this one) for my niece for Christmas. I just need to finish making the poles.

Fishing set for my niece!

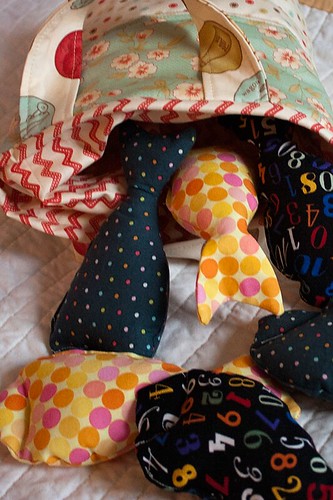
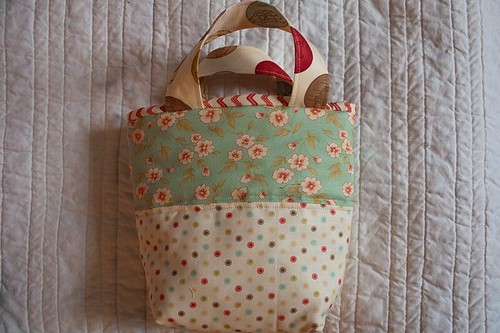
The hardest part of the first fishing set was the stupid (but cute!) bucket. So, I whipped up this decidedly non-fishing bag to hold the fish, instead.

Fishy bag

It's based on this pattern, but I just used up the scraps that I had, so the measurements are a little different. It will have a drawstring, once I scrounge one up. Might have to settle for yarn.

I am the final queen bee, bee mama, bee person - whatever you want to call it - for Bee a {Modern} Swapper. And after much deliberation, I chose the very traditional churn dash block (but 4 minis in 1 block!) and asked for scrappy, modern fabrics. I made a gallery of examples. Can't wait to see what my co-honeycombers come up with!

Actually, I never posted Novembers blocks for Whitney - here they are:

Ba{M}S November Blocks

They were a little late, but they have safely arrived already. This is a non-paper pieced block called Wonky Pinwheels. Tutorial here from Greenleaf Goods. I love the colors she chose and I can't wait to see how it turns out!

I've also been putting together my hospital bag. I'm using a pattern by Studio Cherie/Simplicity 2274. Here's a little, in progress photo (this is the inside - just need to attach the sides!):

Simplicity 2274

It's been a multi-stage process, I think I began about two weeks ago. I have a post started about how I went about constructing the pattern and the various blogposts I consulted before beginning. I don't think it's a difficult pattern. But, like all bags, there are a ton of steps and there's a certain amount of bulk to work through your machine. So far, I'm pretty excited about it.

Simplicity 2274

I have all my fabric washed and waiting to make receiving blankets and Boppy covers, but those will have to wait until after we celebrate the holidays. My husband has been practicing swaddling with a Mickey Mouse doll we got for free at Babies R Us and a hooded towel, so he's eager for me to finish up the receiving blankets so he can practice "for real." :)

Here are a few homemade goodies for the baby from my very talented family members:

My aunt in Texas crocheted the baby about 9 or 10 blankets of varying sizes and weights. This is just one of them!


My Minnesota aunt made this lovely batik quilt:


And my cousin made me a variety of burp cloths, washcloths, and this great changing mat with lime PUL fabric on one side (love it!).


The washcloths and pink burp cloths are such great ways to use up smaller pieces of fabric that you can't bear to throw away!

Happy holidays to everyone! Hope to have lots more fun things to share soon! 

Out to shovel now...

Wednesday, November 28, 2012

Baby Quilts and Mail Day!

Snowballs close-up

We just got home late Monday night from 11 days in Minnesota. It's always like the circus when we come to town because we have two dogs and lots and lots of stuff. This time around we were celebrating Thanksgiving and we were also meeting our new niece and nephew. We also had some holiday cookie decorating to do with the older nieces and nephews and so many great friends to catch up with, as well. So, our car was especially overloaded! (The load didn't get any lighter on the way back to Wisconsin, either, as I was the grateful recipient of a baby shower thrown by my sister.)

Phew! I wish I had cleaned the house before we left :) Coming home to a messy house is never fun.

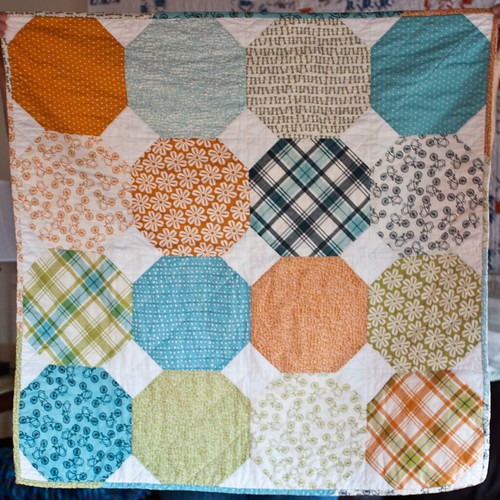
Snowballs baby quilt

This is the simple snowball quilt for my nephew. I did inverted Vs for the quilting (meeting in the middle). The blocks are 10" unfinished, to show off all of that fun fabric. I tried to do an X thru the center with the darker orange pieces and the darker blue pieces. I think I pulled a little on the binding, so that bottom right corner did curl a little bit.

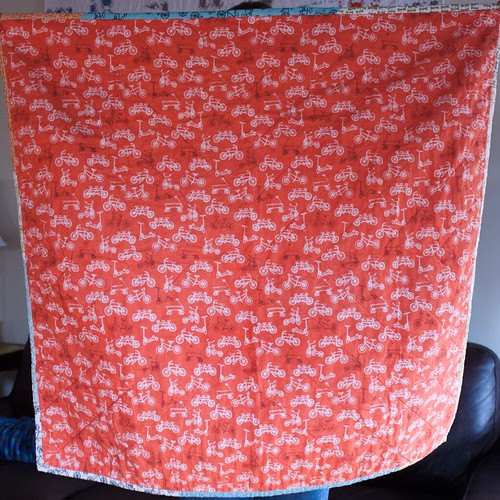
Snowball backing

I used some Children at Play flannel for the back. I just love the rich orange color! I used a slightly thinner batting this time around. A 100% cotton, something I picked up at JoAnn's. I think it was a Pellon product. I didn't have any trouble and I think it actually shrunk less in the wash than it said it would. I thought it would be nicer, in case my brother and sister-in-law actually use it as a cover, in addition to a play mat and changing mat!

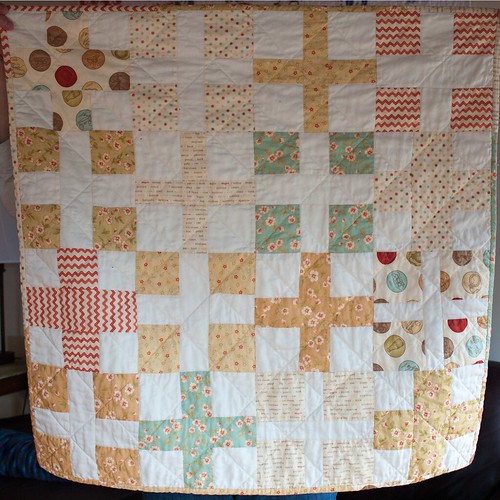
Simple Math baby quilt

This one is for my niece. It is from Elizabeth Hartman's Simple Math pattern. I was going to go wonky, like the un-sashed version in the pattern but my husband rightly pointed out that this particular family might do better with right angles! The pluses are different sizes, which is kind of hard to see. But I really like how it turned out.

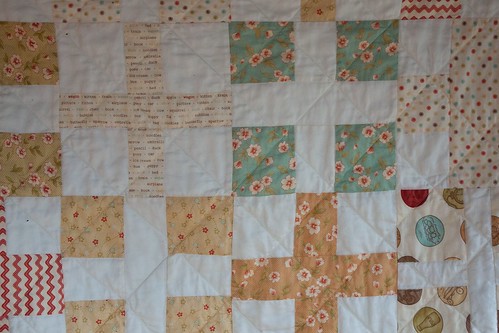
Simple Math close-up

I did just a simple 4" grid for the quilting.

Here's the TypeB moment: I decided to use Ivory cotton sateen on this. I usually use Kona or Bella solids, which I don't think have a particular "side." Here, unfortunately, there was a definite side. Do you know how I know - once I got it all put together, I could see the differences in sheen. It doesn't show up in the photos, but it definitely shows up in person.

Ah well, inadvertent design choice, I guess.

Simple Math backing

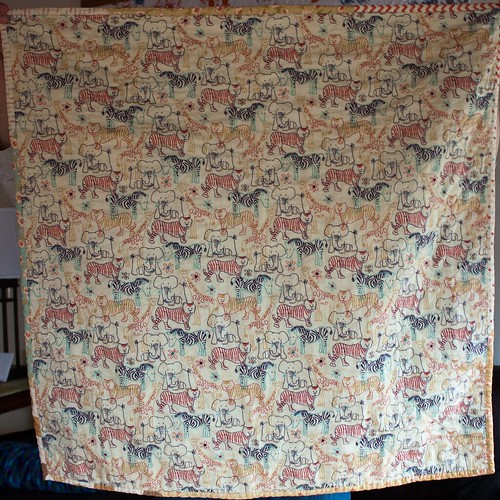
This is a flannel I bought from fabric.com. The colors work perfectly with Whimsy and adds a little more of a, dare I say... whimsical - element to the quilt. Babies love animals :) My brother really liked it and said he especially liked that it was an alternative to all of the pink they've been receiving.

When we got home, we had a lot of mail, mostly junk. But I also received this...

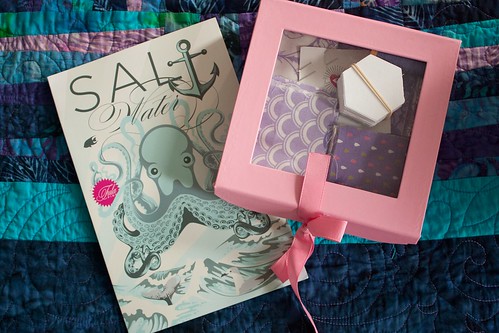
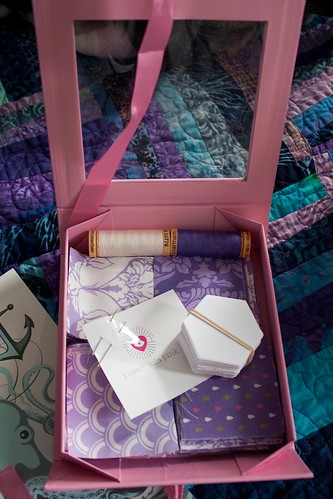
Full Moon Forest Hexie kit

I purchased this hexie kit from the i heart tula pink shop. I rarely see the purple colorway of Full Moon Forest available for sale and I pounced on the chance to have some. Plus, as I get larger and it's harder to sit at the sewing machine for a long time, I like the idea of having some handwork to do. I haven't tried english paper piecing before but I'm excited to give it a try. The shop thru in a little flyer about the upcoming Tula prints. Very excited for Salt Water.

Full Moon Forest Hexie kit

I have an idea of what I want to do with them once I'm finished, but I don't want to give too much a way yet :)

Wednesday, November 14, 2012

The Grannies Are In!

NYGB Granny Squares Group 2

Here are my untrimmed blocks from the Not Your Granny's Bee, Group 2. I made the pink and green block - the second one from the right in the top row.

I just love them! I can't decide which is my favorite. I am going to put white sashing between the rows. I can't decide if I should make two baby quilt (lots of babies in my family) or one lap quilt.

There are only two blocks that didn't quite make the "rules." (The two in the middle of the first column on the left). We were supposed to keep the center 5 blocks the same color. But I don't think that's a big deal. You can't really tell when they are all together.

I had a very successful destash and I am so grateful to everyone who purchased some fabric. I'm so glad they all went to a good home. I have just a couple more items and I am going to put up the Flutterby today.

This past week, I was a lucky aunt times two! I had a nephew born on Wednesday and a niece born on Thursday! I actually have quilt tops finished for both of them. I haven't made a ton of baby quilts, but I Just love these small 40x40 quilts - they go together so fast! Here's a terrible photo:

Baby Quilts in Progress


The top quilt (still in blocks) was made from the Moda Whimsy fabric that I won on Sew Mama Sew's Giveaway Day and some ivory cotton sateen. It is for my new niece. The bottom quilt is for my new nephew and is made with Moda Lucy's Crab Shack with Kona Snow and is just a snowball quilt. It's such a simple block, but I really love it!

Can I just say, once again, how much I hate basting. Hate it, hate it, hate it. My husband had a piece of plywood or something that is about 50x50 and I was able to get the boy's quilt basted already, but man, do I hate basting (did I say that already?)! I hope to get the next one done today.

I broke my walking foot a while back. And my old trusty New Home doesn't really love quilting (not like my Juki in storage - she's the quilting bomb!), but I'm going to give it a shot with my regular sewing machine foot. Hopefully, I can finish it up before I return to Minnesota for Thanksgiving. I got a stocking to make before then, too. So much to do!

Monday, October 29, 2012

NewsFlash: I've Been Sewing!

Cloth Napkins

I think my sewing mojo is coming back! I just got a ton of sewing books from the library. I cut out blocks for a baby quilt. And I even purchased some new fabric (not to replenish my stock from my destash, but as backings for the baby quilts I need to make!)! I think the greater the morning sickness, the lesser interest in sewing. Now that I'm feeling better, I am better able to focus on other things.

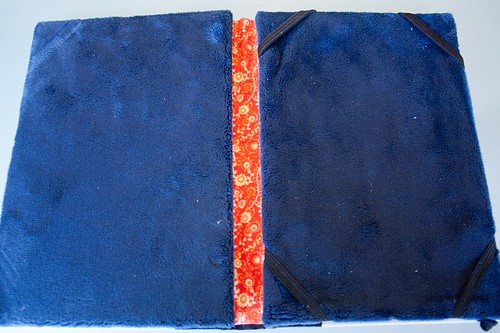
I whipped up a couple October birthday presents a couple weeks ago.  My mom turned 60 and on the same day, my stepdad turned 59! My siblings and I got my mom a Kindle Fire and a gift certificate to Amazon. So, I thought I'd try my hand at making a cover for her.

Kindle Cover

I've made Kindle covers before. But this time, I decided to try one that was made out of an old book. I wanted to use a Nancy Drew hardcover. So, I cut out a piece of cardboard the size of the Kindle and brought it with my local to Half Priced Books. Unfortunately, I got my measurements a little wrong, so my sample was larger than the actual Kindle. I ended up buying a Pushkin book that had a cute cover under the dust jacket. But when I got it home, I realized that it wasn't wide enough, so I used another book that I had just purchased from the Clearance section, instead.

Kindle Cover

I googled around and found several good tutorials that I used as guidelines. I just wanted to see what it would be like if I tried to make it. So, I told her that she is, of course, free to buy an actual case that may keep the Kindle in there a little better.

Kindle Cover  

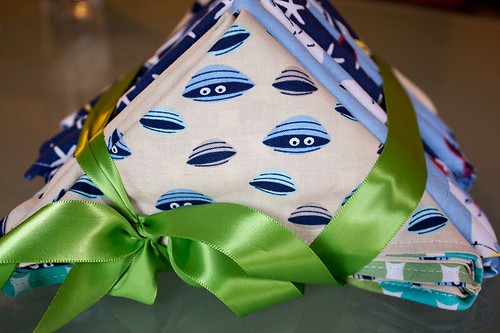
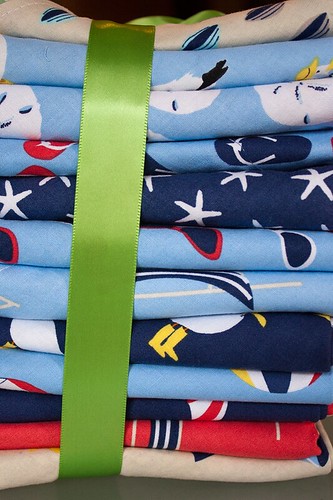
I picked out a dozen of my favorite prints from the Dear Stella, It's a Shore Thing line and made cloth napkins for my stepdad. I used some cotton sateen and some cotton lawn scraps for the backing. And they made a really nice, soft counterpart to the quilting cottons.

Cloth Napkins

I also received my swap blocks from the Not Your Granny's Bee! I love them! I can't wait to put them together. What a fun way to get a variety of blocks but still use the strip piecing method. I can't decide if  should try to ask for more of these blocks for my month in the Bee a {Modern} Swapper group, as well. Or if I should just make these into a cute baby quilt...

Not Your Granny's Bee swap blocks

Here's a sneak peek of the blocks I cut out and pieced for one of the three baby quilts that I have due. 

Baby Quilt WIP

Hopefully, this week I will be able to get the blocks cut out and pieced for one of the others, as well. We'll see how long this sewing jag lasts!

Monday, September 24, 2012

September Sewing

Ba{M}S-September Block 2

I had some sewing to get done this month and I'm happy to say, I got it all done. I had a non-shower/shower for two of my sisters-in-law who are expecting in the next two months. (This is the second baby for each, so it was sort of a celebration of moms and babies, without being a full-blown shower.) I managed to get a couple of cotton knit blankets made in the wee hours before attending the non-shower shower. Wanna see a pic. Oh, you can't because I didn't have a camera :( It's something like this but I make them double-layered.

I also finished up 16 blocks for the Not Your Granny's Bee block swap. I missed the deadline but looking at the "blocks received list," I'm gonna give myself a pat on the back. I'd love to show you pictures, but yet again. I don't have any. Another lesson learned - when you're sewing under the gun, you're almost always going to make mistakes.  And by "you," I mean "me." I sewed up my first set of 8 back in May or June - right when I had drunk the Kool-Aid and was all high on just-signed-up-for-a-bee energy. I followed Katy's instructions to a T and ll was right with the world.

Fast-forward 4 months (four months?!), and I was feverishly sewing on September 14th at 10pm, trying to make the September 15 deadline. Did I re-check the directions? No, I did not. Did I glance at the 8 blocks I had already made for reference? No, I did not. Did I make the deadline? No, I did not. Did my blocks come out exactly as they should have? (Say it with me, now...) No, they did not. I defaulted to pressing my seams open, instead of pressing them to the side. As a consequence, my Snow blocks are nice and flat and my Charcoal and White blocks are a bit puffy. Blerg.

The seams notwithstanding, I love the blocks and I'm looking forward to receiving the others. Embarrassed to be the swapper who sent messy blocks, but I hope they will forgive me and use them anyway.

I was able to finish up my September Bee a {Modern} Swapper blocks this weekend. Mosaic blocks take me forever! This time, I laid out my scraps and tried to make sure I'd have enough for a 12.5" square block with the sashing. Did I? No, I did not. (OK, I'll stop doing that now.) But I was able to find enough scraps to make them work. Mary asked for Mosaic blocks in fall colors.

Ba{M}S-September Block 1

I had only made one before (I mistakenly thought that I had made a pair of them, but the one probably took me so long I thought I had made two!). So, this time around, I figured I'd do a little more planning, cut my pieces a little bigger and it would all come out right.

Well... it was fine. It was a little better than the first time. No seam-ripping, at least. Hopefully the pieces aren't too big. Lots of old scraps in these blocks!

Onward and upward, as my professor used to say!

Friday, August 31, 2012

Zero Motivation

*crickets* *crickets*

Hello, is this thing on? Oh yes, I see, it is still working. Phew!

Long time, no blog, eh? Well, there has been next to nothing to blog about, I'm afraid. I haven't sewn a thing! Well, I was able to finish up a meagre gift for my friend who recently had a baby. Where is it?  Still sitting in its box on my cutting table, even though the baby is almost 3 weeks old... Not the quilt I already have sketched out and designed and hoped to deliver pre-baby. No, just a simple receiving blanket and some burp clothes. But even that took a lot out of me :)

I've lost my manic scrolling through sewing/crafting blogs, trolling for fabric bargains, and near-constant checking Flickr for quilts to adore and fabric to swap. I have a couple September bee commitments and I have no idea how I am going to meet them. I have even considered a major destash of my most of my quilting fabric! Maybe even some Tula (*gasp*).

I guess what I'm trying to say is that I have lost my sewing mojo. What has overtaken me and caused me to turn away from a long-cherished creative outlet?!

Major morning sickness. The really yucky kind that doesn't end after the first trimester. It just keeps going and going and going like that blasted Energizer bunny. (All those nefarious pregnancy books and websites that "welcome" you to your second trimester and congratulate you on reaching the "honeymoon period"where you are feeling "more energized" and "better than ever": lies. All lies.)

At the same time the nausea, giddy worrying, and tentative excitement took over my life, my sewing passion (and accompanying fabric consumption) seems to have taken its leave. I don't know if/when/how I will be able to find my inspiration again. I literally have projects cut out or very near completion sitting around my sewing area. But alas, my machine is just gathering dust.  I should probably put the cover on it :) I guess time will tell.

I think I probably will do a little destash here on the blog because we live in a one bedroom condo at the moment and we will need a little more room for all the stuff that seems to come along with a baby. So, maybe over the holiday weekend I can will get that together. We'll call it Destash for Diapers! I don't have a lot of special, out of print or hard to finds, but I have some nice stuff that might round out someone's stash.

I appreciate everyone who has been kind enough to follow along with my little sewing journal here. I hope that I will have something to share in the future. But it might be a bit quiet around here until I succeed in recapturing my quilting mania. Thanks for reading!

Monday, July 16, 2012

Ba{M}S July Blocks and a Swap

Ba{M}S July Block #1 (Honeycomb 4)

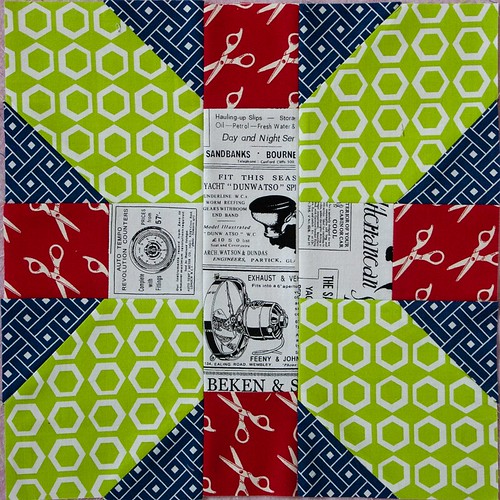
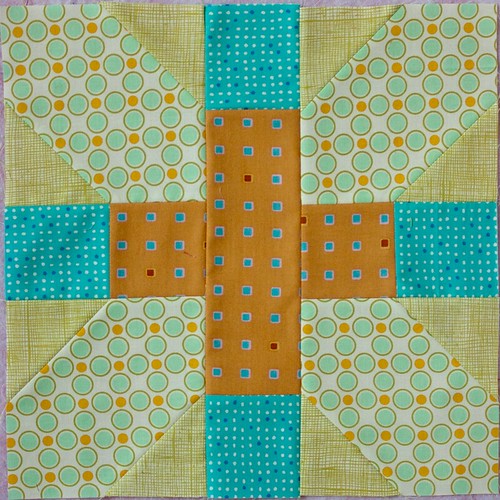
Just a quick post to show off my July Bee a {Modern} Swapper July blocks for Carolyn/Demanding Cat.

She asked for two x/cross blocks like the ones in Amy/Badskirt's tutorial here. Carolyn increased the block size to 13" for her blocks. She asked for text prints if we had them and then colors similar to howAmy puts colors together. Hopefully, I got that right.

Ba{M}S July Block #2 (Honeycomb 4) 

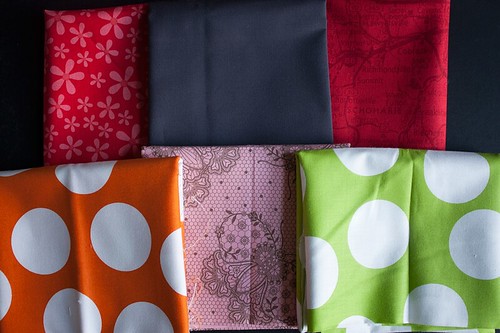
I also made another awesome swap with Monica. I was able to re-home my Nicey Jane left overs and she sent me some beauties! I'm so happy to get the Kona Charcoal, because I need it to work on my granny squares (so far, I only have the Snow blocks done...). I love those giant dots! When Half Mood Modern came out, I didn't realize that the dots were so big and I didn't think to get any. And Monica read about me lamenting my lack of reds and she kindly shared some of hers with me. That map print is the bomb! And Tula lace - what can you say about that?! I'll add it to my collection (*insert evil laugh*)!

Awesome Swap with buttoncounter

I will be welcoming three new babies to my friend and family circle this fall - Sept, Oct, and Nov. So, it might be all baby, all the time around here for a while. Since that's most of the sewing I'll be doing, I won't try to keep things a surprise - otherwise I'll have nothing to post :) They'll all get quilts eventually (probably post-natal) but before, I'd like to get them cotton knit receiving blankets (not "knit" with needles, "knit" as in t-shirt material), burp cloths and hopefully, diaper/wipe keepers. It's also my mom's 60th birthday in October and I've started a rather ambitious (for me) project for her. But I have an almost done top that could step in, in case I don't quite make the deadline :) I'd also like to make a bean bag toss for my to-be-3 nephew's birthday, but I don't know if I will make it. I might have to get *gasp* something store bought. Say it ain't so...

Onwards and upwards!

Thursday, June 28, 2012

Memory/Concentration/I Spy Game


       IMG_3824

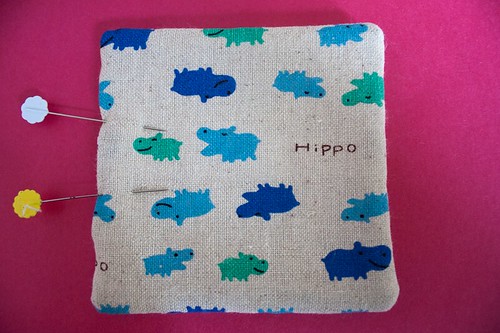
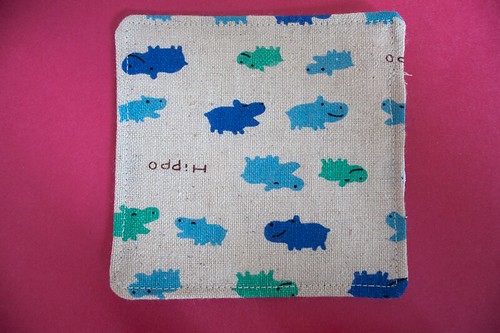
I made my 2 year old nephew a memory game and am including the steps below. Again, this is a Type B tutorial, so probably not up to snuff of more professional/monetized blogs (this is just a sewing journal, after all). But I thought I would get my steps down here, anyway. Typically, I didn't take a photo of the finished project (classic me) but you get the idea.

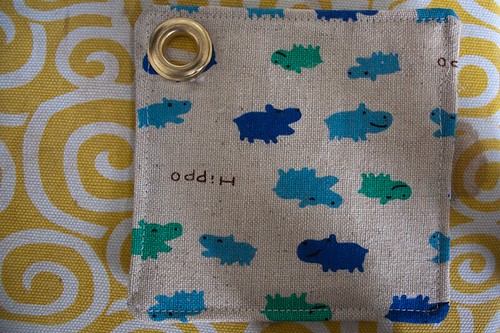
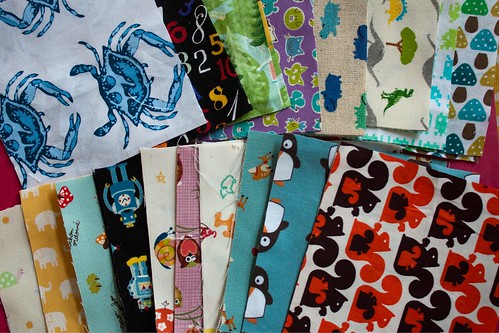
I was part of a Japanese import swap last year and I had all of these novelty type 5" squares. Some are cotton, some are linen/cotton mixes and I wasn't really sure what to do with them. Some of them were suitable for an I Spy quilt and some not. But I had two of each. So I pulled out the ones I thought would be best for a Memory game and I added to them with some of my stash. I trimmed them all to 4.5" because I thought 4" finished was just about the right size for little hands. I wanted to make them portable, so I added a grommet (super fun, gets out any aggression you might be feeling!) and would like to string them on a large binder ring (as soon as I find one!).

I made 36 (18 pairs), which is a lot, in retrospect.  But it's also a good in case you lose one or two or someone eats one, etc. 

Requirements:
IMG_3813
18 pairs of 4.5" squares (36 total) - could use a charm pack that has two of each print, as well.


IMG_3809 
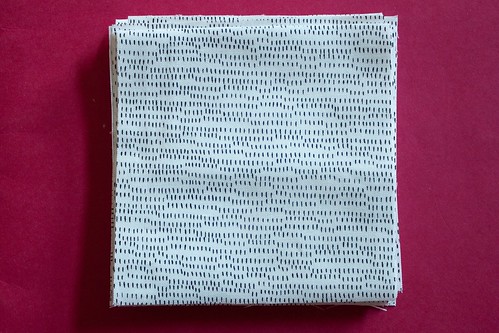
Generous 1/2 yard of fabric (you need 18" exactly for 4.5" finished blocks)

IMG_3811
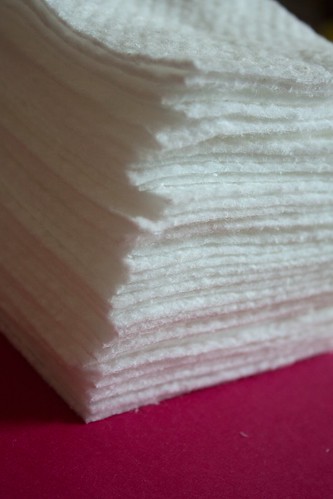
36 batting squares - I cut mine to 4.25" to cut down on bulk 
(you could cut yours to 4.5" and trim as needed)

IMG_3814 
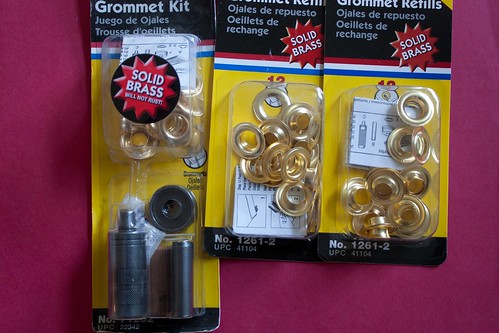
Grommets - one for each card. I got these at Home Depot, but I believe there are craft versions, too.

IMG_3815

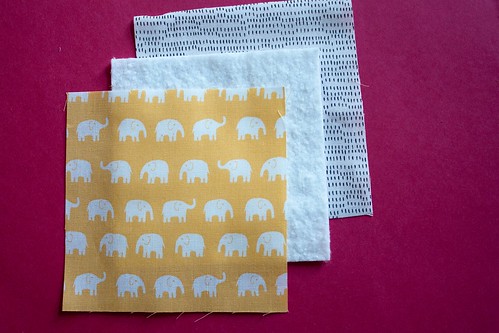
For each card, you need one square for the front of the card, one square for the back of the card, and one square of batting.

IMG_3816

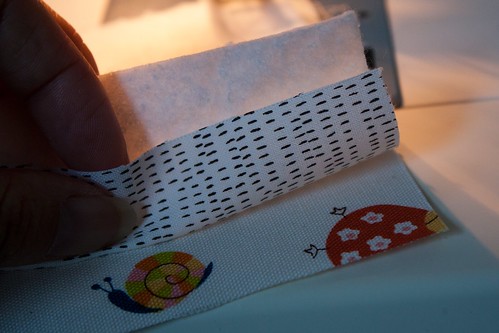
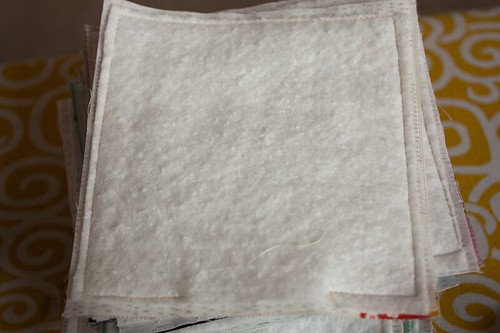
Layer the squares front square right side together with the back square, laying the batting on the wrong side of the back square.

IMG_3817


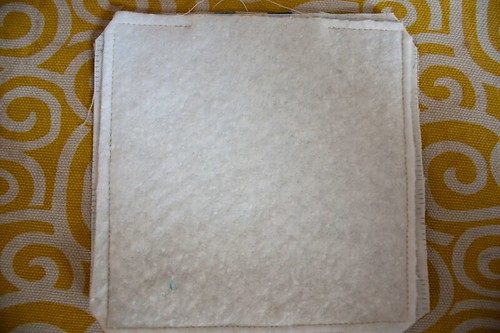
Starting in the middle of one of the sides, backstitch a couple stitches and sew around the edges 1/4" stopping 2" from where you started.  Backstitch. (If you use the smaller batting squares, try to catch the batting in the 1/4" seam.)

Try to avoid doing this:

IMG_3825

Remember - right sides together. Right side to wrong side plus batting = seam ripping!

IMG_3819


Clip the corners of the blocks/cards you've sewn properly.

IMG_3820
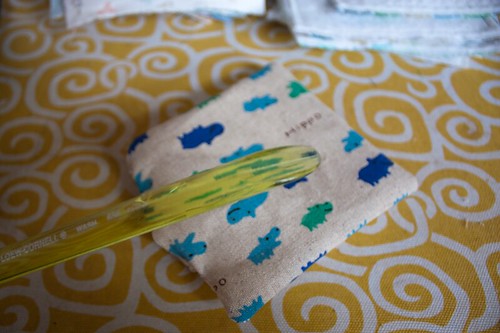
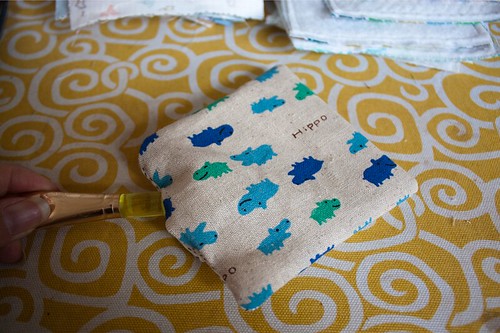
Using the gap left in the seam, turn the fabric right side out so that the batting is now on the inside.

Use a chop stick, or if you're type B, a paintbrush handle to poke out the corners.

IMG_3821

Press if desired.  Topstitch around the card.

IMG_3822 IMG_3823

Repeat for all cards. 

Enjoy!

(optional) Adding the grommets - there is a grommet tool at Joann's but I can't vouch for it. I got my grommets and tool at Home Depot. The grommets came in packages of 12, so that worked out great for me!
There are a lot of tutorials on inserting grommets, so I won't belabor the point here. I will say that you need to cut a hole in the corner of your "cards" - you can't use the little cutter-outer tool they provide; the card will be too thick. But the cutter tool will help to mark the card.

Once you have your first grommet in, however, you'll feel really proud of yourself, so I say - go for the grommets.  You'll like it!

Playing the game
For a two year old, you might start with all of the "cards" face up and just pick out the matching pairs. Then you can turn them over and play "for real." You can also use them to play I Spy ("I spy with my little eye some robots"), either laid out on the floor or even on the ring. The ring will easily attach to a bag or purse, so it's portable!
There are other versions of the game herehere, and here.