Pages

Wednesday, December 22, 2010

WIP Wednesday - Christmas edition*

*This post was previously posted on my personal blog, but I've moved it over here and filed it under WIP Wednesdays, even tho they are finished projects.

Hi and hello there. Here are some projects I've been working on. I follow about 147 blogs (!!), most of them are sewing/quilting blogs, the rest are cooking blogs. So, I have a constant stream of inspiration. But sometimes I find myself so focused on planning projects (and buying fabric....) that I don't actually get any done.

What I learned this Christmas season is that I am going to adopt my mom's philosophy on sewing gifts, which is to not sew on a deadline. Making something for someone on their birthday or before December 1st or before a baby is born can be a lot of pressure and then sometimes the end product gets rushed and the result is not what you'd hoped.

Such was the case with this (actually, this was the best of the three, but still not what I'd hoped):


I made three of these (THREE!!), one for each of my siblings based on this tutorial (sorry for the terrible photos!). Since they are advent calendars, I rushed to get them done by December 1st. I had a great start - started in October - but then other things took my attention and I was scrambling at the end. Given the time and materials that went into them, I was a bit disappointed that I sacrificed quality in the rush to finish (especially on the last one).


I ended up using Mod Podge to glue the numbers on (I know, I know - you're horrified, but I've yet to flex my applique muscles and I couldn't make a stitch nice enough to give it a go.) But, even if the numbers fall off, the pockets should still hold up :) There's a silver lining in every cloud!

I was really happy with this:


A modern tree skirt (inspired by this tutorial) I made for my parents. It was my first time making "improvisational" log cabin blocks (aka "wonky log cabin"). I made a few mistakes/learned a few lessons, but I am pleased with the result.


What do you get for fickle teenagers for Christmas? Yes, nothing says "I love you" like cold hard cash/giftcards. But I made them a little something anyway - this mini makeup roll. This is a great little pattern for using up some scraps and holding your Rudolph marshmallow lip balm!


And because I can't leave well enough alone - giftcard cozies - I know, I know. But creation is a compulsion and fabric is my mode of expression!


Then I tucked it all away in one of these bags:


Type B moment: no topstitching on the Amy Butler one - oopsy daisy!

Finally, I am working on upcycling some of my old wool sweaters that have been shrunk(en?) or become hole-y. I have yet to perfect my mitten technique, but once I do, I think they'll be pretty nice.


No use wasting a nice cashmere sweater! (Well, the black and white one was a thrift store find that I never wore...) And they have soft minkee linings! They are a bit too narrow, even for me and I have pretty small hands. And the thumb is weird. But live and learn, that's what I say.

Monday, December 6, 2010

Twister Quilt**

**Back-posting from my personal blog**

Typically blurry photo
Not much to report here, so I thought I'd share a project that I made when I was last in Minnesota. I usually don't post quilts because I have plans for them and I want it to be a surprise. But this one is for me (you might recognize the fabrics from my stepdad's wallhangings)!

I got a new quilting tool called the Lil Twister - it was developed by a women in Superior, WI. This one for use with 5" squares. The full-sized Twister is for 10" squares. **2011 update, my mom gave me one, now I'm just waiting for the right layer cake!


You start out by sewing all of your charm squares together (I had four packs of Neptune, with some left over) and add a 3" border- easy, peasy (Kona Slate).


Here's a close up of those Neptune fabrics again.


Then you place the acrylic template over the corner seams and cut out the square on the diagonal.


Those squares I have circled are the pieces that I cut (by hand!) down to 2.5" for the wallhanging. Waste not, want not.

The only thing you really need to do is be careful to set your new blocks in order because it would be a massive pain to try to untangle them. After all that sewing and re-cutting, you get...

Tadah!!


I didn't do a great job of spreading out the darkest blue blocks (they look black here) but other than that I am really pleased. Not sure how I'll quilt this one...

Sunday, December 5, 2010

Father's Day Quilts**

**Back-posting from my personal blog. Father's Day 2010**


Here are my Father's Day projects - postage stamp wall-hangings.

These two are for my stepdad:


I made two wall hangings/mini-quilts for stepdad (maybe 20"x20" probably smaller). The photo in the upper left hand corner and the one on the bottom. The fabric is called Neptune, after the god, not the planet (though, I guess the planet was named after the god as well...). So, it has a maritime/nautical theme. There are fish scales, waves, seaweed, shells, fishes, ships and anchors. I thought they would work well in the cabanas that he is building on the Eastern Shore.

I did all the work with my new machine, piecing, quilting, binding. I used a new binding foot, but it wasn't that successful (you can see how the bottom one doesn't lay flat, it is partly the quilting stretching the fabric and partly the binding). The one in the upper left was quilted with straight lines going one direction and I hand stitched the binding - looks a lot better, but not quite as interesting as the lower one. The squares in the middle are 2". I used a varigated blue thread to do the quilting that went from dark to light blue. The top right is the back of the quilt on its left, which I pieced with 5" squares.

Here is the quilt I made for my dad:


This fabric is called Midwest Modern, by Amy Butler and I just used the oranges and blue/greens. You can see how small the center pieces are - they should be 1 inch square (smaller than a quarter) but some of them are a little more rectangular. On this one I tried a more ambitious quilting pattern (for me), which you can see around the border. It is called a straight-line meander. I also added a small pinwheel block with the left-overs and pieced it in the back. I quilted around the pinwheel and added a button flower on the front, where the points meet. I can't remember how big this one measures - probably close to 20"x20" as well. I used the unfortunate binding foot on this one, too. (I really should learn that when the quilts are so small, I should be able to do the binding by hand...) The quilting thread is varigated green, yellow, and orange, so perfect for this quilt.

The theory behind these quilts is that they are made from scraps of fabric from quilts that will eventually reside in my house. So, a small piece of my quilts will also live in my dad's and my stepdad's houses, as well. Also, I love both of these sets of fabric so much and I didn't want to waste a speck of it.

To make the centers I used this tutorial from Elizabeth Hartman, who does amazing work and has a great blog called Oh Fransson (which I believe is an Astrid Lindgren reference). You can see how nice and flat her quilt is against the wall and she used a traditional curved meander (which I have been completely unable to replicate... thus, the straight-line meander).

Here are some construction photos from my dad's quilt:

You start out with a square of fusible interfacing on which you draw a grid (these squares started at 1.5"). You lay our your squares. When the fabric is ironed to the interfacing it sticks.

Then, you flip it over and iron the first row along the seam and sew. Repeat.

Cut a small amount off of each seam and press the seams open.

Now you have a rectangle with one set of seams sewn.

Flip it over and sew the perpendicular seams. Trim, iron open. The back now looks like this:

When you turn it over - voila, a mini quilt top without the borders.

Saturday, December 4, 2010

Q is for Quilting, Part 4**

**Previously published on my personal blog, this series of posts is aimed at explaining to non-quilters just what goes into making a quilt.  Thought I'd move them over here to Type B**


And we come to the end. This may be the fastest I've made a quilt - from yardage to binding.

The last steps include layering the backing (wrong side up) by taping it to a stable surface (I used the deck here for air circulation - not the greatest idea, given that it was kinda dirty...):


Then the batting (80% cotton, 20% polyester):


And finally, the top (right side up):


At this point, you baste the three layers together so that the layers won't shift while quilting. In the past, I have used pins. But pinning a quilt, even a small one, requires some times on your knees, bending over the quilt (one pin per fist-length = a lot of pins and a back ache!). Another option is to make long stitches (2"-3" per stitch) by hand, every three inches - this is the old school method, but I have never tried this. This time I decided to try spray basting, using an aerosol adhesive product. It worked great! I am definitely going to use it again for future projects. Basically, all you do is spray the batting and press it into place on the backing and repeat with the top.

Then, the quilting. I did straight-line quilting with my walking foot and even though I can't sew in a straight line, I think it worked out pretty well. The spray basting held up and washed out.


And then, binding. There are a ton of binding tips, tutorials and videos all over the web. Just do the Google thing. Binding the quilt adds a finished edge by enclosing the unfinished edges of the quilt sandwich. I started by sewing 2.5" strips into one long strip. Then, I folded it in half and ironed. I bind on the straight of grain, but bias is certainly a strong option, as well. These are jelly roll strips, so they are straight of grain.


I attached the strip - raw edges to raw edge of the quilt top:


Then you get something like this, framing the whole top:


Connecting the ends of the binding so that it matches up... well, I have to do it a couple times to get it right! But anyway, the final step is to turn the binding over to the back and hand-stitch the binding on the fold. The goal is to have an the binding even and "full," so that the quilt sandwich is filling the fold of the binding. Sometimes I fail at both of these things...


The result is the photo at the top of the post. I made it scrappy, using left over strips. With a quilt of this size, doing it by hand is pretty simple. When you get to larger - queen size quilts - it can be a more challenging endeavor. It is possible to attach a binding using a machine, but I have not been successful at making it look nice, so, by hand it is!

And here she is - Welcome Spring - my style:

Top

Back

Friday, December 3, 2010

Q is for Quilting, Part 3**

**Previously published on my personal blog, this series of posts is aimed at explaining to non-quilters just what goes into making a quilt.  Thought I'd move them over here to Type B**


Anatomy of a quilt

How do we get from this:


... a pile of fabric strips, to a quilt that will actually keep your toe-sies warm? Good question.

Which came first, the pattern or the fabric? Well, it might vary with every project. Sometimes I find a pattern I like and I put it aside until I have the fabric that I like. Other times, I have the fabric but have to wait for the right pattern to come along. For this quilt it was the pattern first (Cherri House is a genius!), jelly roll second (Sanae's Oz line for Moda). If you like the modern, asymmetry of this quilt (I love it!), it is a great quilt for a new quilter.

I started out by auditioning fabrics. I used a jelly roll, so all of my 2.5" strips were already cut and coordinated. I did not have a design wall when I started the project, so I just used masking tape and taped each strip to the wall in the order that I found pleasing. For this project, it is a good idea to number the strips.

I decided to make the quilt a little bit bigger, so I added four more strips. It is also helpful to slide your eyes out of focus while looking at your blocks/strips to see if anything stands out - for instance, are all your dark strips on one side? Do you have two strips that are too similar next to each other? Too much green on one area, too much red in another? A camera is a great resource here, too.


Once they were in an arrangement I liked, I started cutting, making sure to keep them in the proper order. Then I prepared the solid ivory fabric according to the pattern directions.


Then I sewed all of the strips together. One tip when sewing long seams like this - remember to alternate the direction that you are sewing. So, if you sewed two strips together, top to bottom, when adding the next strip or strip set, sew bottom to top. This will help to ensure that your quilt top will not be distorted as you sew.


And here's the finished top! You might notice that I forgot one 1.5" strip of ivory at the bottom but I've fixed that now.


Here's a shot of the backing:


Usually, you want the backing to be 2"-4" larger than your quilt top (4" for sure if you are sending it out to be quilted).

I really like this one. It's not very big, maybe 50x60? But it is just the right size for sitting on the couch with a book or watching a game. I'm having a tough time finding my 1/4" seam on my new machine, so that's why it turned out a bit smaller than it should have... but I'm a Type B crafter and I don't worry too much about those things. I leave perfection to other people.


Here's another one I'm working on, also from Moda Bake Shop. I also altered this one a little because I didn't have enough fabric for sashing (the solid strips in between) and I am trying, desperately trying (and miserably failing), to use fabric that I have, rather than buying more.

This is an easy pattern except for folding the stars. But once you get the hang of it, it is pretty easy (there is a link in the comments to a video on how to do it that I found helpful). The only putzy part is tacking down the star points and centers, which has to be done by hand. Without the stars, you could just use 6.5" squares. Then it would be super fast and easy.

You'll notice that I was able to forgo the masking tape because I did get a design wall of sorts. You can buy one online or at JoAnn's for $25 or so. But I found an 6'x8' plastic tablecloth on clearance at Target for $3.50. The backing is just the right fabric for a design wall - the fabric sticks to it but is easily released. I also bought three small 3M hangers, cut some holes in the tablecloth and voila - design wall on a budget!

Next up - finishing up. The dreaded B word (no, not that b-word): Binding. Cue the dramatic music... dun, dun, duuuuuun.

Thursday, December 2, 2010

Q is for Quilting, Part 2**

**Previously published on my personal blog, this series of posts is aimed at explaining to non-quilters just what goes into making a quilt.  Thought I'd move them over here to Type B**

Leanika by Dena Designs for Free Spirit Fabric

We covered the basics in the last post - quilting, what is it? In this post, we're going to talk about supplies and fabric. (Oh, how I love fabric!) What do you need to start quilting? Well, women in colonial times made do with the following:


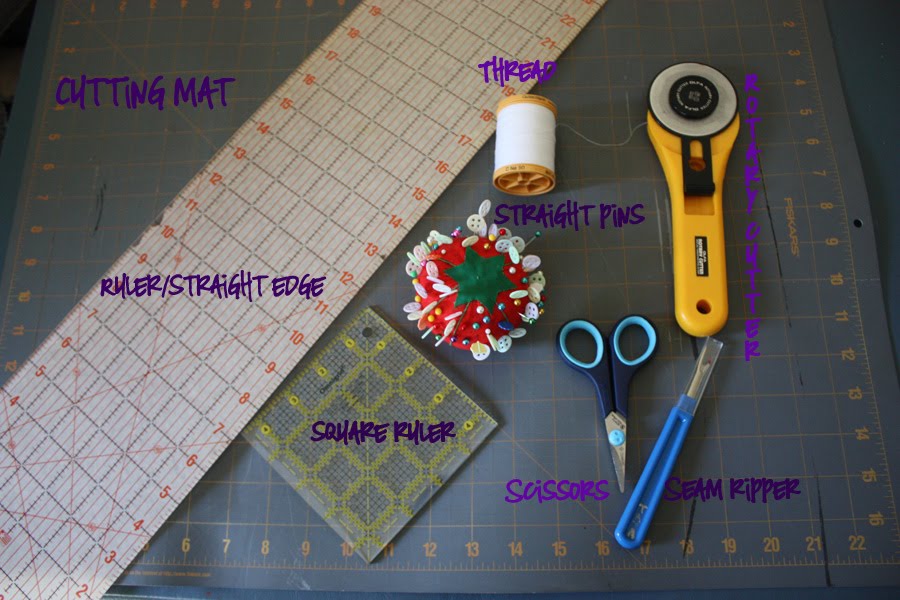
But if you're quilting in the modern times, I'd suggest at minimum the following:


Selecting a sewing machine
And, of course, a sewing machine. You want to buy the best machine you can afford. That doesn't mean that you need to get a $12,000 Bernina. The quilters in my family use machines from simple, mechanical machines from the 1950's up to the most high-tech computerized quilting and embroidery machines.


I have one computerized machine (the New Home/Janome on the left, purchased from craigslist) and one mechanical machine (the Juki TL98Q on the right). There is less to go wrong with a mechanical machine and they can stitch faster, but they have less options and need to be oiled after each use. On the other hand, computerized machines have more bells and whistles but need to be treated with a little more care.

A good idea is to make a list of must-have features (I wanted a zig-zag, needle-down position, feed dogs that you could lower, and a free-arm for clothes sewing) and then try to find the machine that is the best fit. Most important is that you are comfortable with the machine and know its quirks and kinks. Generally, if you have a bad first experience with your sewing machine, you will be less likely to continue sewing. So try some out before you take the plunge!

Take a look at this post, as well, for beginning quilters. This blog is having a great series on Sewing 101 (it reminded me that I forgot to say iron and ironing board in my supplies list - very important!)

On to fabric!
Some people collect antiques, stamps, or rare books - I collect fabric! The bulk is sitting in large bins in our storage unit in New Mexico, but I've been adding to my collection since I've moved to WI in 2009. At least it doesn't look like this blogger's mom's stash! I have also finished six quilt tops and I'm working on a seventh - we'll call it my Fitchburg Period.

Leanika by Dena Designs for Free Spirit Fabric

It probably goes without saying, but fabric comes in different grades and qualities. Based on the way the fabric is woven, it will stand up to treatment differently (is it for a rough-and-tumble toddler/young child or for a wallhanging that will be spot-treated? Will it be in direct sunlight?). Think of it the same way you think about sheets and thread count; you can feel the difference. You can buy fabric at JoAnn's or Hancock's for $1.99-5.99/yard or you can buy it at a local quilt shop (LQS) for $9-$12/yard. What is going on there? There are a couple answers to that question here and here. Essentially, the quality of cotton used and the processes to fix the ink vary and quilts will wear differently (especially bright colors) over time. Many quilters use 100% cotton fabrics for quilting. Usually, though not always, you will be able to feel the quality, just by touching the fabric.

House by Annette Tatum for Free Spirit Fabric

I recommend buying what you can afford - don't let cost hold you back from any creative endeavor! Remember that the first quilts were made of left-over clothes and linens (more well-to-do women did intricate whole cloth quilts to show off their stitch work). Perhaps it goes without saying, of course, that those early quilts were also made out of only natural fibers, as well. I've seen some great contemporary quilts from re-purposed clothes. If cost is a concern, I suggest buying reliable brand-name fabric from Fabric.com where quality fabric can be on sale for $4/yard (and if you spend $35, you get free shipping). You will be happier with the investment of your time and talents if you use the best quality you can afford. (I'm not going to jump whole hog into the Kona cotton debate - Joann's vs LQS, but here is what Robert Kaufman fabrics has to say. I buy from everywhere.)

Fabric comes in lines released similar to clothing lines (i.e., the Calvin Klein Summer 2010 line of swimwear). Christmas fabrics tend to come out in the summer, so people can get their holiday projects finished in time. The lines have matching colors, coordinating patterns and variation between large, medium, and small prints. Reliable name-brands - Moda, Kaufman, Hoffman, Timeless Treasures, Thimbleberries, Westminster/Free Spirit, Alexander Henry, Michael Miller, Riley Blake, etc.

Moda pre-cuts - Verna, Neptune, Fresh Air, and Panache lines

One way to get started if you are overwhelmed by choosing fabric is to use pre-cuts. Moda has a "bakery line" which includes one to two pieces of each fabric design in a line. In the photo above you can see jelly rolls (40-2.5" strips), honey buns (40-1.5" strips), charm squares (40-5" squares), and layer cakes (40-10" squares). (Not pictured are turnovers - 6" triangles, which I believe are not being made anymore? Also honey buns seem to be on their way out...). Moda Bake Shop is a great blog where guest bloggers provide free patterns and tutorials using these precut items. Pre-cuts save you some time cutting (duh!), but often you pay more per-yard, if you do the math. I try to buy them only when they are on sale. Another great way to get started - quilt kits, which include a pattern and all the fabric needed to make the top - easy, peasy.

Kona Cotton from Hancock's of Paducah and JoAnn Fabric

Here are some places that I like to buy fabric (and patterns):
Fabric.com (this is kind of like the TJ Maxx of fabric stores)
Fat Quarter Shop
Hancock's of Paducah (a huge store in a quilting town that hosts the American Quilting Society's Quilt Show each April)
JoJo's Gift Shoppe
Burgundy Buttons
Pink Chalk Fabrics
Amazon.com (sells fabric for other shops, but if you use Swagbucks to earn $5 giftcards, you can basically work up to free fabric, if you are very patient and don't buy books first! Using Swagbucks and a Groupon-type deal, I purchased a Parisville FQ bundle for less than $30!)

There are many others and I just keep my eye open for items that are on-sale from various newsletters that I receive.


Next up - Assembly (if I get the quilt assembled, that is!).