Wednesday, August 31, 2011
TwitterB-September-Me!
Finally back to quilting. I've been working pretty diligently on my Project Modern entry and getting psyched for my TwitterB month. This post is for my fellow TwitterB-ers!
As the saying goes, great minds think alike and for Molly and me that means Wonky Stars. So, if it feels like deja vu all over again, it is :) I'm asking for 12.5" unfinished blocks red/orange/yellow stars in a Kona Pepper background.
I've used Pepper in a number of projects, but I've been having trouble photographing it, so I thought I'd post the difference between Black and Pepper from Robert Kaufman's website.
The Pepper is a slightly bluer, muted black and just a softer look overall. I think the Pepper makes a nice night sky for the Wonky stars.
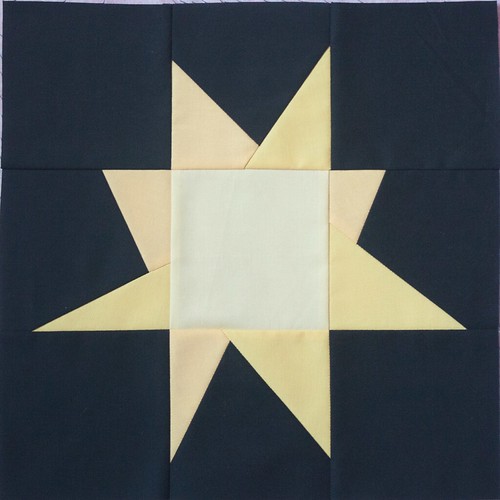
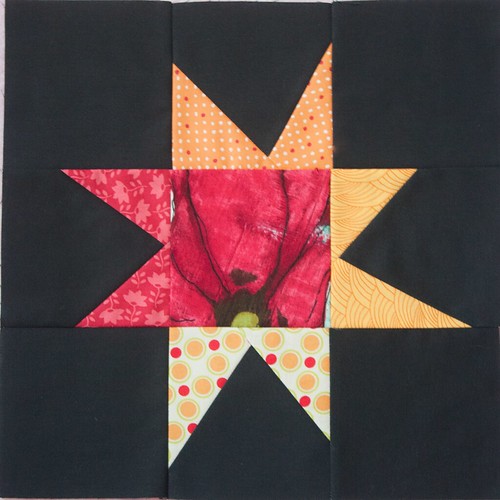
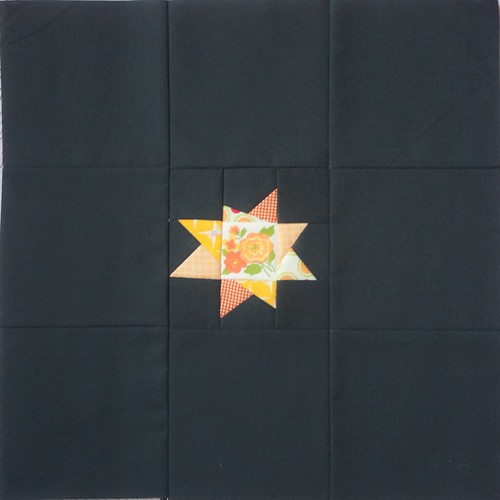
I got a bit over-eager and put some sample blocks together in early August during a hiatus from birthday present-making as examples for other TwitterB-ers. The two above are the basic 12.5" blocks based on the Wonky Star Block tutorial from The Silly Boo Dilly blog. She has a note about cutting the star point squares a little larger to create more dramatic points. I cut my squares for the star points 1/2" larger (so, for a finished 4.5" block, I cut the star point fabrics to 5"), but I don't know that it is really necessary. It's something you can play around with. You can probably get plenty of variation with 4.5" (her block is an example of that) or by using oddly-shaped scraps.
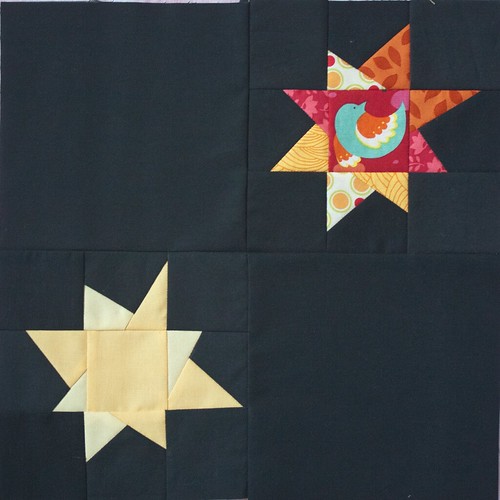
The following are a couple variations, each resulting in a 12.5" unfinished block.
This one is two 6.5" stars and two 6.5" background squares:
From the background:
2 - 6.5" squares
16 - 2.5" squares
For the stars:
2 - 2.5" squares (centers)
8 - 2.5" squares (or a little larger per tutorial - star points)
With this next one, obviously, you can place the star in the middle or somewhere on the outside:
The only thing to be aware of is that the star block is going to be a little larger than 4.5" finished and you need to trim it down to 4.5", which means that when you're sewing the star points, you don't want to place your triangle too closely to the top of the background square (which creates a deeper V in the star points). There needs to be enough for 1/4" seam allowance without cutting off any points. So, a short, shallow V might work better here.
Background:
8 - 4.5" squares [or 2 - 12.5"x4.5" rectangles and 2 - 4.5" squares]
8 - 1.875" (1 7/8") squares
Stars:
1 - 1.875"
4 - 2" (points)
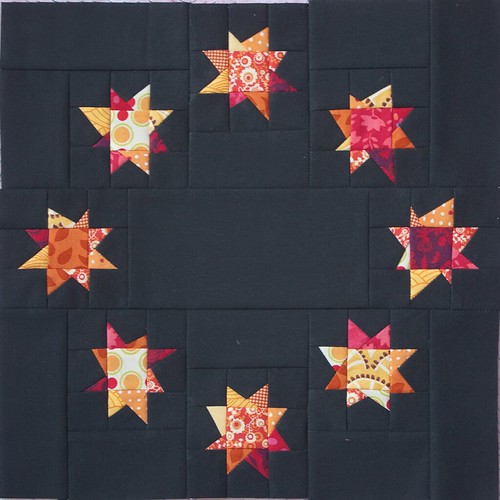
Finally, I decided to go a little crazy and try this ambitious-for-me block: Ring of Stars Block at Cut to Pieces (tutorial at the bottom of her post).
I'm happy with it, but I don't know if it will really go with the rest of the quilt. Maybe for the back... We shall see.
Thanks, TwitterB-ers!
Subscribe to:
Post Comments (Atom)



No comments:
Post a Comment