Pages

Wednesday, September 10, 2014

Selvage Placemats

IMG_7816 

We were in need of some placemats and I decided to take some time last week to make some.

I didn't want to do anything pieced, I wanted to keep it fairly sensitive. And I thought I'd try to use up my selvages. I had been collecting them for a while and I have seen some amazing projects (especially at the Selvage Blog). I Googled for inspiration and found some great ideas. I settled on this layout.

One of the greatest things about this project - minimal pressing! I keep my selvages in an oversized plastic tub that had cheese puffs in it. So, they were scrunchy and had to be pressed, but otherwise, it was just sew, sew, sew!

I separated them out by color, as much as possible. I looked at both the printing on the selvage and whatever remained of the actual pattern, for the color. I ended up with enough for four placemats. I did three color family ones (blue/aqua, pink/red/neutral, and citrusy colors) and one random leftovers.

IMG_7807 IMG_7804

IMG_7806 IMG_7805 

Most placemat patterns seem to be 13"x17." I decided to go bigger and these ended up at about 14"x19," but it would have been better if I had made them a couple inches smaller. There's a reason most patterns called for 13"x17"!

I sewed the first one "wrong" in the sense that I was making more work for myself. So you can see that the pink/red and the random one are a similar layout and the blue and the citrus one are similar. The red/pink one was the first one that I did and for some reason I tucked each strip underneath the previous. I'll blame it on my left-handed brain. Sometimes I just do things backwards. And, for the center strip, I had enough of the print to put right sides together and fold the strip back down towards the batting. So for the bottom two, I worked from the center out and for the top two I worked from the corner in.

Even with the size issue, I am super happy about how they turned out. And who knows, maybe they will shrink a little in the wash.

So, I was able to purge some fabric and I was able to use up some materials I already had and that is a win-win-win situation!

IMG_7809

Friday, August 29, 2014

A {Fabric} Weight on My Shoulders

Plastic bag bag

So... I bought some fabric. The giddy, pleased-as-punch euphoria has since passed, as it always does, and as I look upon my fabric empire, I feel simultaneously overwhelmed and underwhelmed. Clearly, I have a self-control issue. I'm a fabric manufacturer's dream! I also have some on pre-order that will come in next month... After being pretty good for a while, I have fallen off the wagon. And since I have not sewn much in the last two years, the purchases are completely unnecessary. What is the solution?

Stop.Buying.Fabric.

Easy. Right?

Anyway, moving has also opened my eyes the the sheer volume of what I have and how I would feel about having to move it again (I really wouldn't). I definitely have fabric that needs to be re-homed. I have a gorgeous stash of batiks (my first quilting love). And while I don't want to get rid of all of them because I'd like to try my hand at some watercolor quilts in the future, I do not need a whole 20 gallon bin full (ok, it's about half full, the other half is a sad attempt at a quilt-as-you-go braid quilt that needs fixing).

I also just have some random pieces from swaps or grab bags or odd purchases, that just aren't my favorites. I don't want to keep things that I don't really love. And while there is something to be said about working with the non-favorites to change them into useful items, I think I'd prefer to use my limited sewing time to work with fabrics that I really inspire me.

First purge attempt

Here's the first purge. Pretty good. The batiks, minus the 48 strips are about 16 yards. So, I'd guess that's over 30 yards total there! (Barely a dent, alas....) I plan to donate to Green Bag Lady, who takes scraps 3"x18" (for handles) and up. And I'll also be sending some to Margaret's Hope Chest.

I've seen a lot of successful destashes on Instagram and I've bit the bullet and joined on the off-chance that I go that route. I don't want to open an Etsy store just to de-stash and I'm not sure how many crafters really look to ebay for fabric purchases. A lot of successful Instagram destashers are bigger-name bloggers with a legion of faithful followers. So, I don't know if that route would work well for me or not. I've looked at Faith's suggestions and Allison has a whole podcast about it, both of which are very helpful. On the other hand, I've done a bit of destashing right here on the blog, which went ok. I suppose a multi-pronged approach would work best. We'll see. Once I get the donate piles out, I'll have a better idea of what might be de-stashed. I may just decide to donate it all - less work for me and a good deed to boot!

Plastic bag bag Plastic bag bag

All I know is that it would take several lifetimes to get through the fabric I have with the projects that I've been doing (shark bag last week and this 1-hour wonder - the plastic bag holder - this week). The bag holder is a really fun, easy, useful project. There are a ton of tutorials out in the blog-o-sphere. I looked at Jeni's tutorial and Anne Marie's. In the end, I used what I had on hand and I think my rectangle came out to be about 19.5" x 28" before I made the tube.

It hangs in our kitchen, hence the toaster fabric. (I do tend to bring re-usable bags to the grocery store, but I still get produce bags and we also solicit from family members for dog walk bags, so we always have quite the stash of plastic bags). This is way classier than the larger plastic bag they were in!

On the design wall

I've decided to ease back in to quilting by working on quilts that are already in blocks. That way, I can tackle some UFOs and still get some sewing in each evening. Here are my triangles on the wall (again). I've got about six or seven projects of various ages in blocks, though at least three require trimming (blech!). And I need to make a Christmas stocking before mid-September. So that should be enough to be getting on with :) I'm excited to get some of these older projects checked off the list!

Thursday, August 21, 2014

Shark Week


We are not fully unpacked, despite being at our new place for about three weeks. Unpacking with a toddler is a much longer process than unpacking with an infant: they tend to stay where you put them!

Even though we have boxes around, I was still able to get in some sewing time (yea!). I made this little pencil case for my nephew who is turning five next week. I'm going to stuff it with some gummy fish or sharks, instead of pencils :) I used this free pattern and tutorial from Patchwork Posse. I made a couple changes just based on what I had. I used fusible fleece for the interfacing for the body of the shark and then some Pellon Craft Fuse for the fins. I don't have pinking sheers, so I went ahead and sewed the fin pieces right sides together and turned them. If I did it again, I might enlarge the fin pieces a little bit to facilitate the turning. 


The zipper was a big conundrum. Firstly, mine was a bit longer than the 7" the pattern calls for. The tutorial notes that you may have to finagle and do some hand sewing to fully install it and I had to do the same. But before I made one stitch, I sat for a long time trying to figure out how to get it in. And then when I started, it was a bit of a mess. If I make another one, I think I will try to insert the zipper first, the way you would make a simple, rectangular zippered pouch.


I also got started on my Washi muslin. I've had the pattern for a while and the fabric, but neither the time nor space to get things rolling. I found this Lisette cotton lawn at Joann's on the 50% off Red Tag shelves, so it was only about $2.50. Perfect for a (possibly) wearable muslin. And it if doesn't work out to be wearable, I'll just cut it up and make something for my daughter.


I did make a muslin of the bodice first because I thought I would probably have to add an inch or so, as other people have done. I also thought that the darts hit a bit high for me. Unfortunately, since I am not great at sewing garments, I over-corrected. I added two inches to the bodice length and I moved the darts about an inch and a half down. Now everything is a bit too low. Live and learn.


In the next incarnation, the darts will have to go up a bit and I think adding that one inch to the bodice would be sufficient. I used Megan Nielsen's tutorial on moving the dart and aside from moving them too far, it was pretty easy to to do. Because this is a white print, I have a very thin layer of white voile underlining the pieces. The neckline and hem are not finished, yet. But I managed to do the arm holes. Because I underlined and this is a test garment, I thought I would use the opportunity to practice my bias binding skills and bind the arms and neckline with bias tape. My husband gave me a bias tape maker for my birthday. I gave it a whirl and I like it so far. I think it pays to take time to starch the seams and really prep the strips. But it's really nice to be able to make 100% cotton binding (instead of the cotton/poly mix from the pre-packaged Wright bindings). This lawn is pretty stretchy on the bias, so a little starch might have been helpful. Again, this has been a pretty good project to learn on.

I tend to shy away from making clothes for myself because fit is so important for adults. Kids can use room to grow and change. But it's such a crapshoot each time I start a project for me and then, even if I take the time to make a muslin, it's not a guarantee of success. In the time it takes to trouble-shoot fitting issues with a muslin and then produce an actual piece of clothing, I could have quite a few blocks made or even a whole quilt. So, I never get in the practice and experience you need to become a decent garment maker. Oh well. My beautiful lawns will have to wait.

I'm so happy to have a little space to create, again. It is in no way organized, yet (especially since we haven't fully unpacked), but after dumping everything out, there's just enough room for me to actually make something.


Tuesday, July 29, 2014

Oh {Wonky} Christmas Tree!

Trees and trunks

I finished a project! I know, I'm as surprised as anyone. This is probably the first quilting project I have finished in two years, which was probably a baby quilt. And this one is even smaller! 

It's Christmas in July - a wonky tree wallhanging requested by my stepmom. Well, she requested a Christmas wallhanging and this is what I decided to do. I was going to add in a little triangle Santa at the bottom. But then I figured that the trees alone could be wintery and Christmassy, so she can leave it up thru the winter season (which in Minnesota is quite a long time!). 

I think it's about 22" x  34". I really wanted to make three hanging loops, so it would hang lower, but I couldn't come up with a way to do that that I made sense to me... So, I went with a very thin sleeve. I didn't tack it down to the back because I didn't want the top of the hanging to sit above the rod.

Oh {Wonky} Christmas Tree

In typical me-fashion, this started out as one thing and ended up as another. I wanted to do this as a paper-piecing project - precise and crisp. Then naturally, because I am not precise and I am not good at following directions, things went wrong pretty quickly. The original plan got scrapped and wonky won the day. But, I like the visual interest of the wonky trees and trunks. So, it all worked out. 

Wonky Trees detail

I thought long and hard about the quilting. I am a terrible free motion quilter. Terrible. I know it's about practice, but having the right tools and the right set up is also important. I'm in the midst of moving house, so I definitely don't have any of those things, which I'm sure affected this attempt. But all my other attempts have been pretty abysmal as well. Also, I broke my walking foot a couple years ago, so straight-line is a bit challenging. I looked at other people's beautiful swirls and snowflakes and other intricate designs on their Christmas tree quilts and knew that those were pretty far outside my abilities. But I really didn't want to ruin the whole project with crap quilting.

First, I tried some free-hand square-ish motifs at the the bottom. They do not look great, but are ok. Then I used my regular piecing foot (feed dogs up) and made the triangles between the trees. That actually worked out pretty well. I think the feed dogs helped keep the stitches more even.

Wonky Trees detail Wonky Trees detail

I added a wonky star at the top for interest. I actually started to machine quilt the main negative space in large concentric triangles on the sides, but that quickly got away from me, as my basting had shifted somewhat and as I got closer to the center, there was too much excess fabric bunching up. So - my friend, the seam ripper came out. Then, I spritzed the wallhanging with a little water and gave it a press and the holes pretty much closed up. I was very relieved since I don't plan on washing this one and there were a ton of holes!

Since I had been so disappointed with my efforts to FMQ, I decided it would be a good idea to hand-quilt the remainder of the negative space. I'm not really sure if it turned out to be a good idea, but I figured I could do that better than using the machine. I never really got the thimble/rocking motion down, so each of these stitches is exactly that - one stitch at a time. Not efficient, but ultimately effective.

Wonky Trees detail

I intended to hand-quilt the trees, as well but then I decided I liked them plain. I think that the star and the hand quilting give it a slightly folky feel, which detracts a little bit from the more modern/contemporary feel that I was going for. But overall, I am pretty happy with it and I hope that my stepmom likes it.

To end on an up note, I think that this is probably one of the most successful machine bindings I have ever done. Maybe because it is such a small project. There is one tiny blip on the right side that I can see and that bothers me, but not enough to unpick it and re-do it. With a little pressing, it hangs fine.

So many ideas and designs floating around my head. When we move I will be able to have a dedicated corner in a room to sew, so I hope that I will be able to get back into it and check a few things off of my list!

Wednesday, June 11, 2014

Sewing Again

Shorts

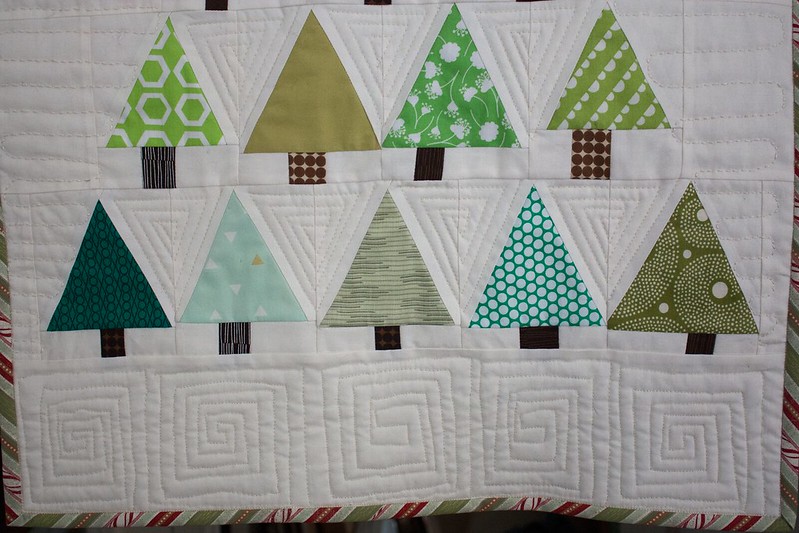
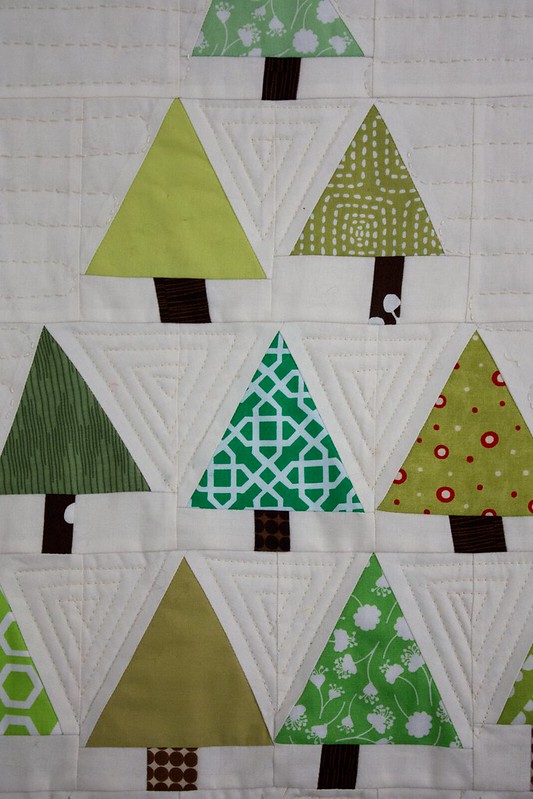
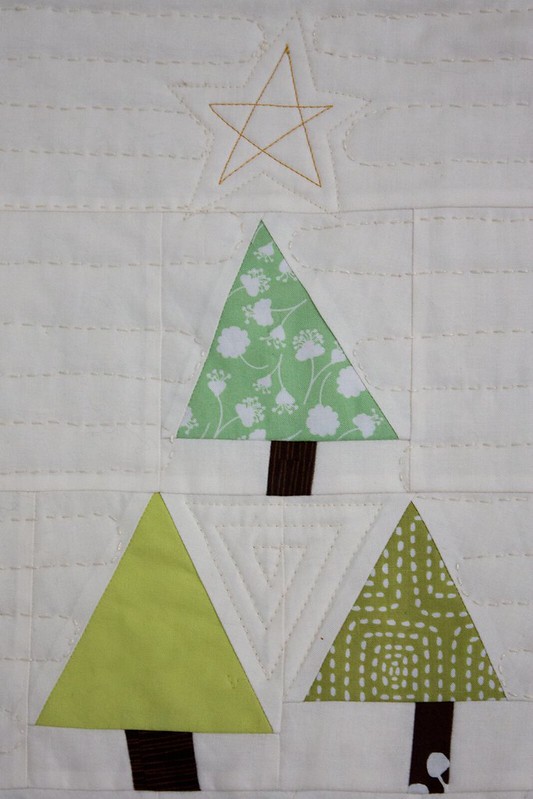
I have started to do a little bit of sewing lately. I've found that with my limited space, the biggest problem is finding a safe place to iron. My 15 month old is not walking on her own, yet, but she is a wicked-fast crawler and she's into pulling stuff down and throwing things. So, ironing, while she is awake is not really safe. And then I have to decide if it's worth it to pull all the sewing stuff out after she goes to bed and then try to get it back away before I hit the hay.

But I was on a little kick a couple of weeks ago and I managed to eek out a few projects.

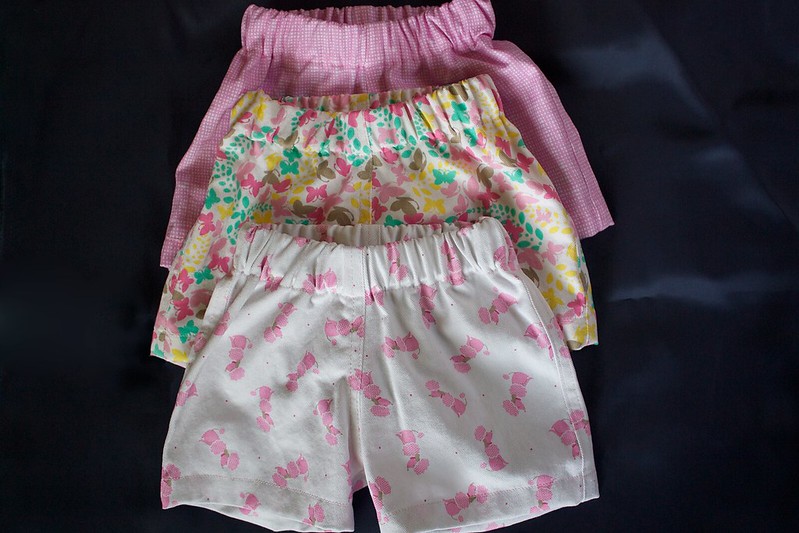
First, my daughter needed a few pairs of shorts now that it's decided to be spring here in Wisconsin. (Took long enough!) I used 
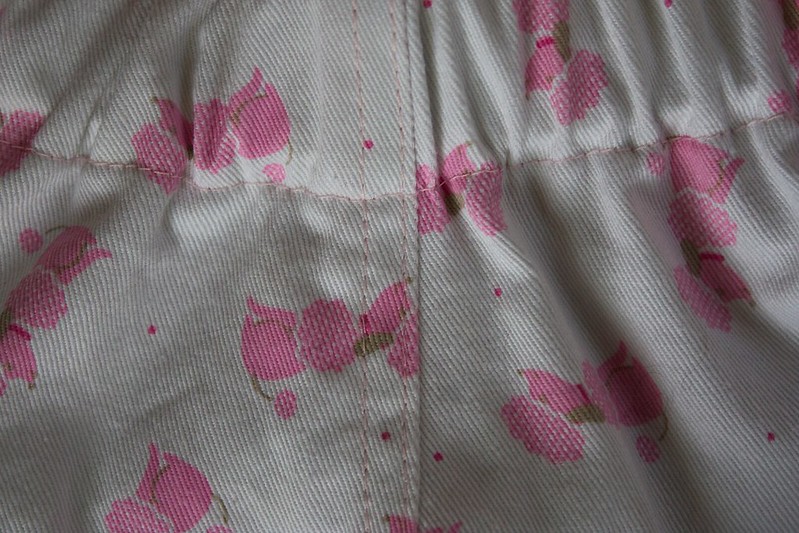
this pattern and tutorial from Caila Made. I printed out the 18 month size and did the cuff-length legs, for longer shorts (oxymoron?). I finished the edges of the seams with an overlock stitch. I broke my actual overlock stitch foot, so technically it's a "special overlock" stitch and it seems a little looser but I think it still gets the job done. Then I did a sort of flat felled seam for all three seams.

Flat felled seams

The pink cross-hatch is a cotton poplin and the other two are twill. They were 50% off red tag at Joann, so each pair cost about $1.25. Here they are in action:

New shorts!

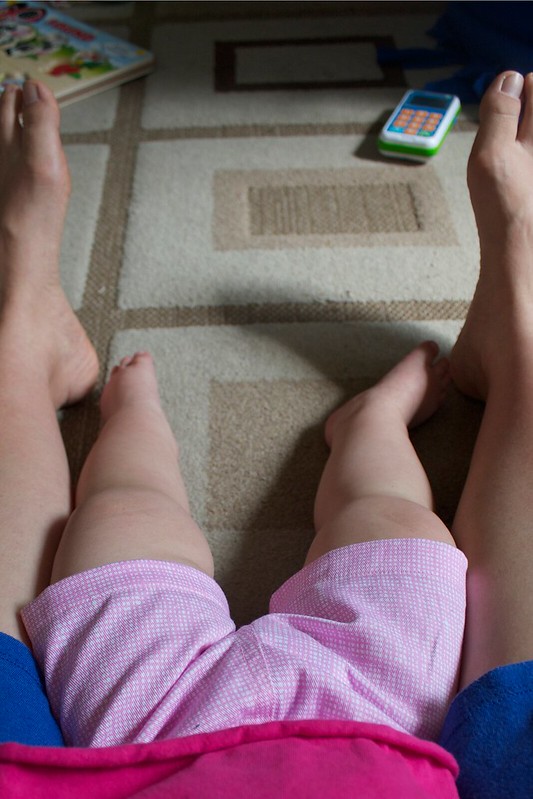
I would say that they could use a little more room in the bum area for a diaper. And if you use cloth diapers, you will probably need to modify them quite a bit to fit the bulk. But they work really well despite that one thing. I forgot to put a little tag or ribbon in the back, but so far daycare and Dad have managed to figure out the front from the back!

AMH Piece a cake dress
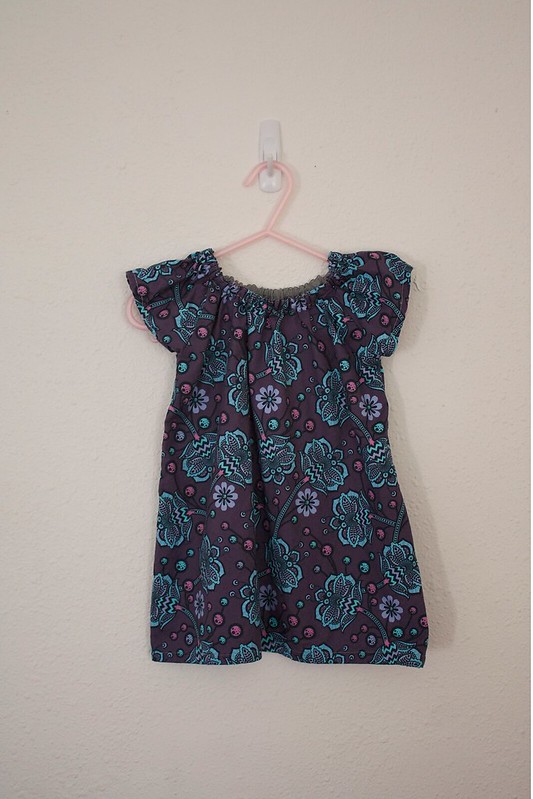
Last weekend, my mother-in-law had a pirate party for all the grandkids. I had wanted to try out Anna Maria Horner's 
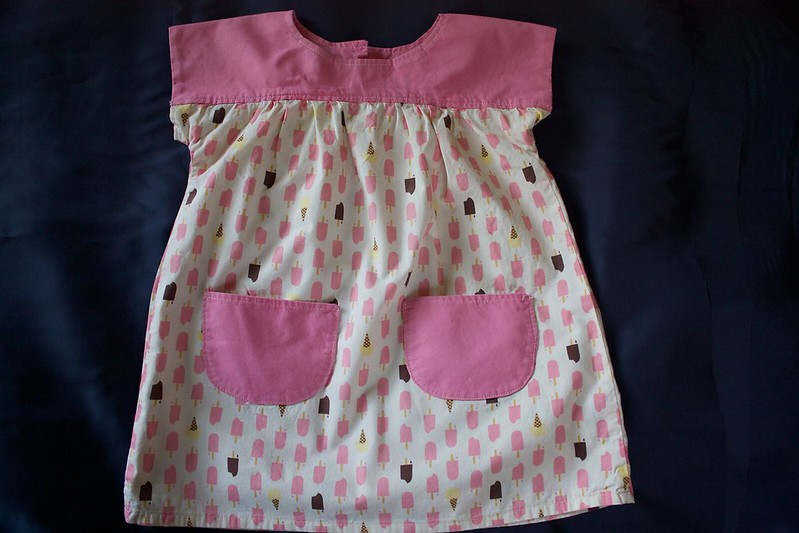
Piece A Cake dress, which is a free pattern and tutorial on the Janome blog. And it looks kinda pirate-y! The largest size is 12 months. But my kid is a teapot ("short and stout" - she's in the 16th percentile for length/height!) and I literally just put away the 9 month clothes about two weeks ago. So, with a flowy dress, I knew that 12 months would still fit her.

I love this fabric so much and I'm so happy with this dress! I have attempted slightly more technically challenging patterns before, but it's the combo of the fabric and the shape that I just love. This is a really simple dress and yet, I had to give it the total Type B treatment because I made it out of a previously-made item. It was a nursing cover and I made it out of this Tula Pink print because I loved it so much and didn't want to cut it to pieces (yet!). But I hardly ever used the cover. So, I decided make it into something else. I used an existing seam for the bottom of the dress, so it might be a little shorter than the pattern calls for. And then I didn't have enough for the total length of the sleeves. I also didn't have the time or inclination to make or buy the proper, single-fold bias binding. But I had a package of double-fold binding. With a little finagling, I made it work for the casing. I don't like that purchased binding is cotton/poly and it's a little itchy, even after you wash it. But my daughter didn't seem to mind. I think I'll make her a pair of these knickers to go under the dress, too!

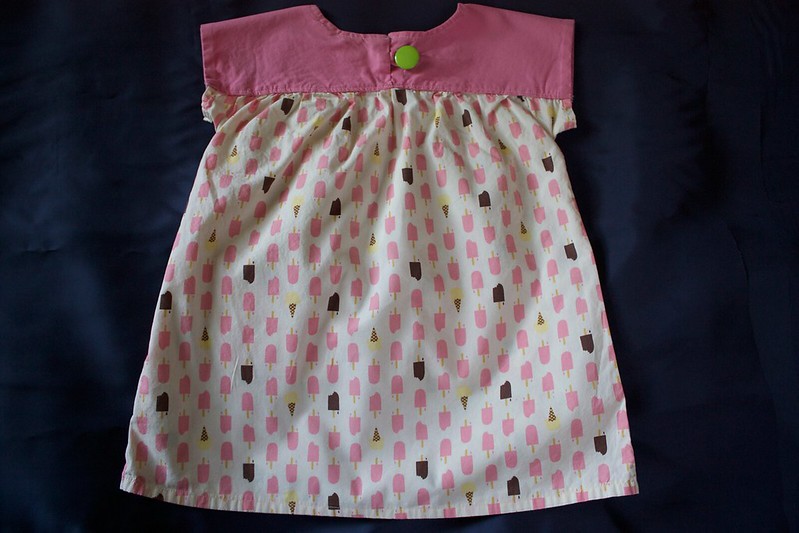
I made this modified Ice Cream Social dress back in May. It's a 12-18 month and I had initially cut out the pieces and intended to make it for my god-daughter. She is 3 years old now... So, my daughter got it instead :) It's definitely a bit roomy on her, but with a long sleeved shirt and some leggings, it might get some use into the fall.

Ice Cream Social Dress


Ice Cream Social Dress

I made this pattern for the first time several years ago and I didn't take a single picture of that process and it resides with a different niece (who is now also, three years old). But, I am not a garment seamstress quite yet (this post notwithstanding), and I had trouble with the notch and figuring out the pockets for that version and I didn't have enough fabric to make the wide band/sashing around the bottom. So, for this one I omitted the notch, did some simple patch pockets and just extended the pattern for the printed fabric to the length of the band.

I also made two muslins for myself. I scored a woven rayon print from fabric.com for about $2/yard. I'd never tried to sew with rayon before, so I thought it would be good practice. First, I made (but did not photograph) what I hoped would be a wearable muslin of the Date Night Dress by April Rhodes, back in April. It's still hanging in the closet, unfinished. Again, I need bias tape and to do the hem. I hate bias tape - making it, anyway.

Next, I've been looking for a pattern to make woven maxi dress out of some cotton voile I have. I know that the Wiksten tank and the Grainline Tiny Pocket tank are really popular. While Googling tank patterns, I came across Megan Nielsen's 
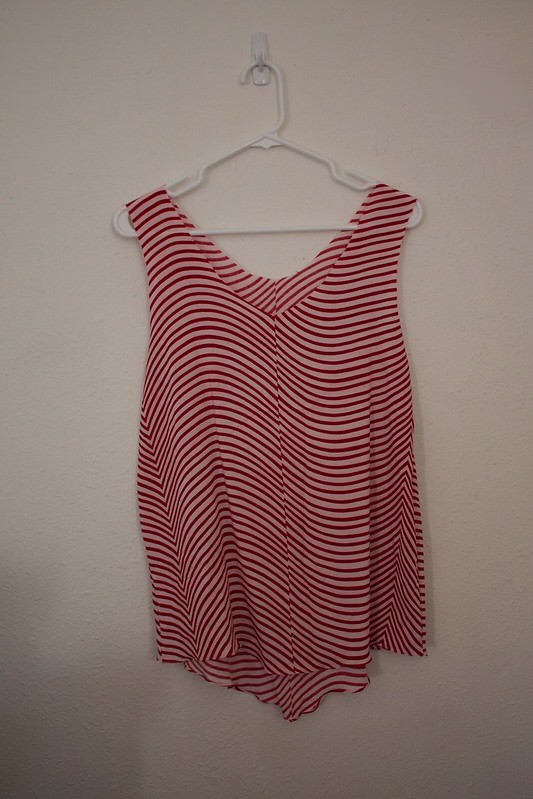
Eucalypt tank and dress pattern. It is super simple - no darts, four seams, and then just finish the open edges. The neck and arms aren't finished on my muslin, but I did try my hand at a rolled hem at the bottom and it worked pretty well with this type of fabric. It was a little challenging for me to move around the bigger curves, but I think that will get better with practice.

Eucalypt muslin

The pattern itself has an option to do a front center-seam, as well. I didn't do one but because of the design of the stripes it looks like there is one. A lot of people noted that the armscyes were a bit low and Megan did a tutorial on how to raise them, but I think I might where a tank under the dress anyway, so I am not going to bother trying to alter it. I think I may need to try my hand at grading out around the hip area, but I like the fit through the top. Who knows when I'll actually get to sewing up a real version. But maybe before summer's out.

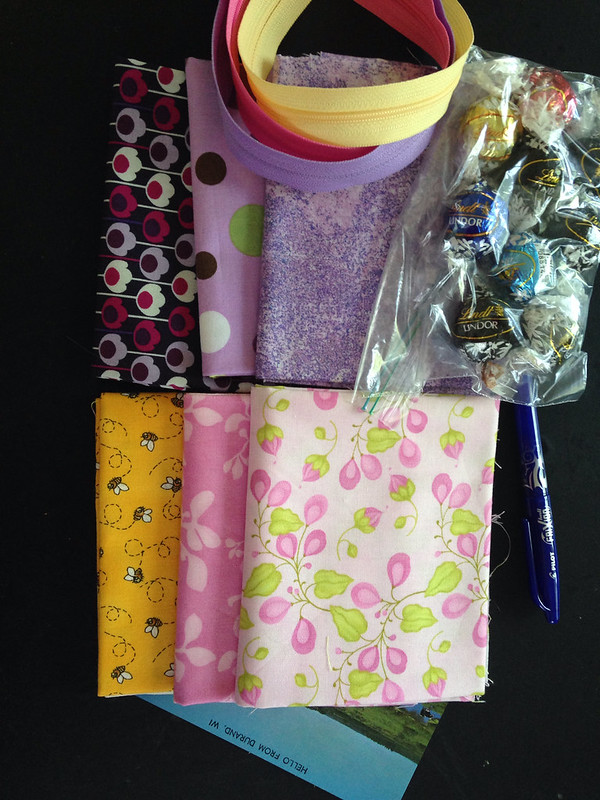
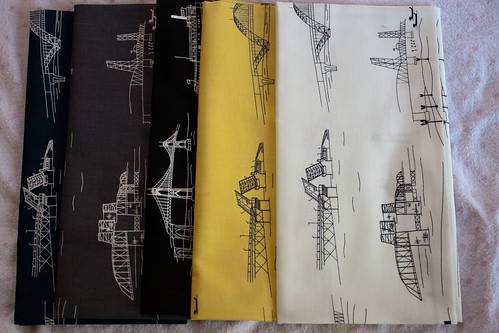
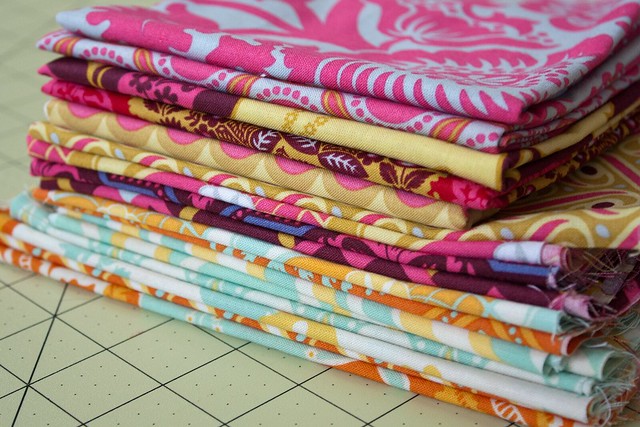
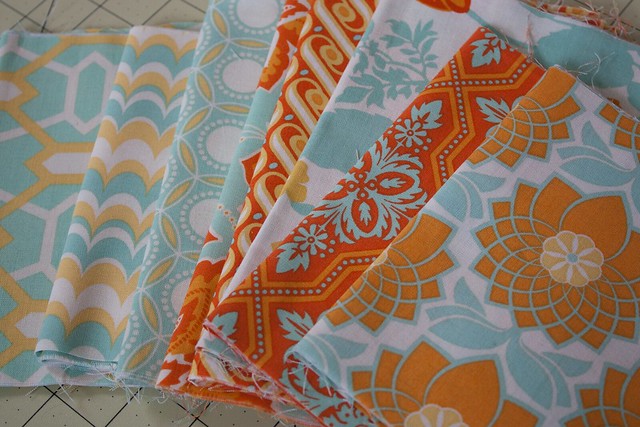
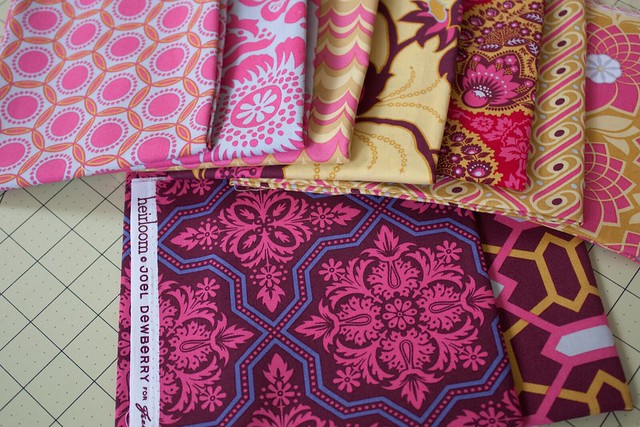
And I joined up with the Monthly Fabric Swap Group again in May with a much better outcome :) I participated in November and sent my package off but did not receive one in return :( The lovely Leona, who runs the swap offered to send something from her own stash, but I didn't think that was fair to her! So, I just chalked it up to - life happens. In May, I got this wonderful package from Jacqueline (another Wisconsin gal). I'm interested in trying out that Frixion pen and everyone needs chocolate when they're sewing :) This is a fun swap, especially if you are trying to hold off on buying fabric but still want to add new things to your stash.

MFSG May package from Jacqueline

So, there it is. A monster post of the things I've managed to over a 2+ month time period! I'll see if I can get another post in before we move house on Aug. 1. It's always good to have goals, right :)

Saturday, May 17, 2014

For the Win!


Thank you to everyone who stopped by my blog and to those of you who entered to win! It was a really fun learning experience. I learned that I need to play around with Rafflecopter before I try to use it again. And I learned that my blog template is somehow resistant to every effort I tried to number my comments (CSS, html, etc.). Beth from the blog Hello Quilt Lady made a valiant effort to help me (thanks, Beth!), but alas, no numbers. So, I decided to do it the old fashioned way - I picked a random number and counted. I'll play around more with my blog template and see if I can be ready for next time.

More importantly, I learned that quite a few of you are making (or have made) plus quilts or string blocks recently. There was a lot of love for the half-square triangle and paper piecing. A lot of quilters chose their first quilt as their favorite. For others, it's always the last project they worked on. A lot of people mentioned that they were really proud of a certain project and then said, "even though it's not perfect," or something similar. Personally, I think technical perfection is overrated (notice the title of this blog...). It's nice to have a goal and good craftsmanship is a worthy one, but we're all learning and growing. A project that you give your time to, that you put your heart into, that is cherished and enjoyed - that sounds like perfection to me! Let's encourage one another!

(I tried to reply to comments and then I just got over-run, so I stopped :) But I read them all and visited any links that you shared.)

Without further ado (sorry for so much of the fore-going "ado"!). Drumroll please...

The winner of Giveaway #1 - the Joel Dewberry Heirloom fabric is #164...

Selleck

The winner of Giveaway #2 - the Waterfront Park bridges fabric is #123...

Catskill Quilter

I have emailed both Catskill Quilter and Selleck. Thanks again, everyone! Hopefully, I'll run things a little better next time :)

Happy sewing! Make something beautiful!

Monday, May 12, 2014

SewMamaSew Giveaway Day Giveaway #2

Waterfront Park for swap

(***Edited - I removed the Rafflecopter app since the number of entries was not tracking with the number of comments. I will just pick a number at random (with the help of a trusty assistant or random.org) and count my way to the winner :)***)

Hey there Sew Mama Sew Giveaway Day blog hoppers!

As the title says - this is SMS GD Giveaway #2 for my blog. Please see post #1 for the other giveaway. This is the first time I'm doing a giveaway and I have a feeling that I'll do something to mess it up, but you take the good, you take the bad, you take them both and there you have...

(Did you shout "the Facts of Life?!" If so, that is awesome. If you didn't, well, that's totally fine, too. Facts of Life was an American sitcom from the 80's. George Clooney even had a role on some of the later seasons, long before his Academy Award days.)

Anyhoo, I decided to do two giveaways because I couldn't figure out how to do it in one and in the interest of full disclosure, I wanted to let people know that I had previously listed these five fabrics in some Flickr swap groups but didn't get any takers. But I still felt like there was someone out there who might really want to use them in their projects. And I thought I might be able to reach that person thru this giveaway. So, if that person is you - please enter! I like all my fabrics to go to homes where they are loved and cherished :)

These are five half-yard cuts in navy, grey, black, yellow and off white and they come from the Waterfront Park collection by Violet Craft for Michael Miller.

Please leave a comment by May 16 at 10:00pm CST and tell me about your current favorite pattern or technique. My apologies, but this is open to US addresses only.

Best of luck! Can't wait to read your comments! Check out more giveaways at SewMamaSew.

SewMamaSew Giveaway Day Giveaway #1

Sew Mama Sew Giveaway

(***Edited - I removed the Rafflecopter app since the number of entries was not tracking with the number of comments. I will just pick a number at random (with the help of a trusty assistant or random.org) and count my way to the winner :)***)

Greetings!  It's SewMamaSew Giveaway Week (Can I get a "woot woot!"? - how 'bout just a "woot!"? It is Monday after all)!

Welcome to my blog! If you poke around, you'll notice that there hasn't been a lot of activity here for the last year, as I had a baby and consequently, my sewing space disappeared :) But I'm still an avid fabric and quitl/sewing inspiration collector.

I have been really lucky to win several giveaways in the past (actually, I just one one two weeks ago from Anna's awesome Noodlehead blog) including a couple SMS giveaway day and I wanted to return the favor to all you fabulous fabric-aholics, fabric connoisseurs, fabric aficionados out there.

I've never done a giveaway before (so sorry in advance if I muck it up!). I really use this space as a sewing journal, to document the projects I'm working on and make little notes for myself, in case I revisit a pattern or idea. And as I mentioned, there's not a lot of activity on here at the moment - though I hope to change that when we move to our new place in August!

Please enter by May 16, 2014 at 10pm CST. Just a comment will do ya - Tell me a project that you are really proud of or that is a favorite that you've made. Share a link if you've got one. C'mon - toot your own horn and we can all share in a Mutual Admiration Society! My apologies, but this is open to US addresses only.

On to the fabric!

I hate to call these "scraps" because I don't want to give the impression that they are schnibbles or snippets. These are legit pieces of fabric! They just aren't full, proper "cuts." So, they are scraps in that sense and because I've used them in a couple projects.

Like this one:
IMG_7206

Or this one:
Patchwork Chevron blocks in progress

Both are still UFOs.  The incomplete zig zag above is a Moda Bake Shop pattern. I have all the blocks done and packed away somewhere. They just didn't all fit on my design wall (which is a flannel-backed vinyl table cloth!) I believe I cut 4" blocks instead of using 5" charm squares. It's hard to remember, since it was a couple of years ago! (Do you have any projects like that?!) I'm sure I wrote it somewhere on this blog - I'll have to take a look!

Sew Mama Sew Giveaway

All fabrics are from the Joel Dewberry Heirloom line from Free Spirit Fabrics. I'd say that most of the pieces are bigger than a fat eighth and maybe around a quarter yard. Some are selvage to selvage, some have one selvage and a small number have neither. There are 17 total prints and I would estimate about 4 yards of fabric. The orange, yellow, aqua ones above are between 6"or 7" by at least 40".

Sew Mama Sew Giveaway

These are wider cuts - closer to 13"-14.5" by 33".  I think one is more like 13" by 29".

These are lovely fabrics. The colors are great - I love the oranges and the pink/garnet prints are really saturated. There's a good mix of really bold graphic prints and more delicate florals to balance it out. I've really had fun working with them and I hope someone else enjoys them too!

I have a second giveaway posted HERE. (Bridges fabric from Waterfront Park.)

Good luck!! I look forward to reading about your awesome projects!
Check out more giveaways at SewMamaSew.


Wednesday, February 26, 2014

Triangulating

IMG_7206

While I am on my sewing hiatus, I've been planning and scheming all the projects I'd like to do this year. I think this year is going to be the Year of the Triangle for me. Hundreds of HSTs figure prominently in a lot the projects. Thankfully, I have my trusty Big Shot and several different HST dies. I think that in the past, the idea if piecing a bunch of HSTs and having to trim them down and clip all the dog ears kind of turned me off. But since I have efficiently trimmed my 680 HSTs from the last post, I am rarin' to go!

IMG_7210

For this WIP, I cut 170 isosceles triangles using the Wonder Triangles Quilt Sense ruler about a year ago. The ruler also comes with a half triangle ruler to make the triangle into a square block. I used it to cut the ends of the rows. I wanted to make the quilt 13 full triangles across and 14 full triangles down, so I needed to cut a few more. Most of the prints are florals from the Heirloom line by Joel Dewberry, but I added in some text and geometrical prints. These are the fabrics I pulled (the text print at the bottom right was part of the original group of triangles) for the additional triangles:

IMG_7207

I initially bought the orange and aqua print in the bottom row to add. But once I saw it with the rest of the set, it didn't quite seem to go. The aquas weren't the right shade, either, so I ended up going with these two from Lucy's Crab Shack:

IMG_7209

So, here's an example of the mix - before and after:

IMG_7204

I was a little worried that the new triangles wouldn't work with the original mix, but I like them. There is a lot of variation in the oranges, so the new prints fit right in. The Whimsy text print doesn't totally go, but I didn't cut too many and I think it will help keep the eye moving in the sea of aqua, orange, and yellow. I love how it's coming together and I can't wait to do a little bit of piecing on it!

IMG_7205

I'm linking up to Lee's WIP Wednesday over at Freshly Pieced for the first time! Mostly, I'm a lurker and have just read about other people's WIP but now I'm joining in!

Tuesday, February 4, 2014

Drought and Creative Reawakening?

3" HSTs

I have been having a complete sewing/creative drought. (Those HSTs up there are from... maybe 5 years ago!) I have not sewn a single stitch since... I can hardly remember when. I think I had to rip and re-sew a seam on one of my Boppy covers after my daughter was born late February of last year. Then, I was busy doing baby stuff, and then we moved. So, even though my daughter is old enough that I might be able to sew a little bit, we no longer have the room for sewing.

Sizzix Big Shot

I gifted myself a Sizzix Big Shot for Christmas and I have been playing with it a little bit (I believe Sizzix is marketing a new one that is called the Fabi Personal Fabric Cutter, but I believe it is the same thing as the Big Shot). So, if memory serves (and usually it doesn't), my good intentions for all those HSTs above were to fashion them into a quilt a la Katy's Fat Geese quilt. But you know what they say about good intentions...

Here's where things went wrong. Firstly, I used a method for cutting HSTs from the Quilt in a Jiffy tutorial from Moda Bake Shop. Back in the day, I whipped up a couple of quilts using this pattern. I figured - why not do it with 5" charm squares? So, I had three (maybe four?) sets of charm squares with a variety of white/off-white/beige tones and I paired them with what I think are some Annette Tatum fat quarters that I cut into charm squares. Little did I know that "low volume" quilts would be having their moment in the sun when I finally got back around to to these guys!

So, the MBS tutorial basically has you put two squares, right-sides together. You sew around the four sides and then cut the square diagonally through the center twice (take a look at the tutorial, it will make more sense). Then you press your HSTs open and go on your merry way. So part of the problem is me - my roving 1/4" seam, my impulse to cut more layers than I ought to in one go, and another part is that you are now dealing with a lot of bias edges and despite the fact that charm squares are industrially die-cut, there are still some wonky ones in each bunch. All those things together conspired to create a boatload of inconsistent HSTs. And I had hundreds of them. And they all needed to be dog-eared (which I did at some point, but I think I blocked it out because I cannot remember doing it, for the life of me!). And I pressed the seams to the printed fabric side.

Fat Geese quilt HSTs

I did try to put a few pairs together, to create the fat geese but I found out pretty quickly that all of the afore-mentioned problems meant that the quilt was going to be a hot mess. (Having pressed the seams to the side, my machine had a little trouble going over the bulk of fabric that met at the point of each goose...) So, I abandoned them.

Several years ago, I got them out again and decided I would give them a little starch and press the seams open. Oh, it was so many seams... In the end, I still had the problem of the inconsistent 1/4" and away they went again.

Enter the Big Shot. My initial thought was that I would use the dies to cut my scraps into useable bits. So, to that end, I got a 3" square, a 4.5" tumbler, and a 4.5" HST die. I also decided to get the 2.5"strip die (there are two strips on the die). I know, I know what you're thinking - "you can't cut squares or strips?! Should you be quilting?!' But, let's not judge. I had my reasons. Anyway, in one of Katy's recent posts, she mentioned that she uses her Sizzix to square up her HSTs. Lightbulb! The Big Shot can handle up to 8 layers of fabric at once (I may have inadvertently pushed that "limit" a couple of times).
HST in desperate need of squaring
Desperate need for squaring up
IMG_7065
Perfectly square!
So, even though I can't sew right now, I've been cranking out perfectly squared-up HSTs and it suddenly seems that this perpetual UFO, is now a WIP once again! Not sure when I'll get to sewing. But it feels good to be working with fabric again. I've been having dreams about quilting and I've been looking over patterns and getting ideas on Flickr. I did try to participate in the Monthly Fabric Swap Group in November. But alas, no word from my partner. However, I must note that Leona runs a great swap and she even volunteered to step in for my AWOL partner. But, I still hopeful. Am I delusional? Maybe. I went back and looked at some of the blocks in the bees that I've been in and realized that I'd made some blunders on a couple. We all make mistakes.

Wow, so I had a lot to say - I have blogging diarrhea (bloggarrhea?) Does this mean more blogging? Not dure. (I also write a weekly one for the out-of-town grandparents and even that is hard to keep up!) But I wanted to say that I'm still here, dreaming of quilts, trying to stay creative, always inspired and enjoying other people's creations!