Pages

Wednesday, July 27, 2011

TwitterB-July

July TwitterB Blocks

It's Christmas in July!

Here are my TwitterB blocks for July. Moira picked the same block as Laura - Rectangle Squared
 from Ashley of Film in the Fridge. Moira's focus fabric is the cream and gold swirls.

I do not have very many Christmas fabrics. I made three very time consuming advent calendars last Christmas out of Basic Grey's Figgy Pudding (I think it was that line...) and I had a few coordinating prints left over from that. The green with the little branch clusters is from Twiggy. It's definitely a more muted palette than the traditional green and red, but I thought they went nicely with the cream and gold.

Friday, July 22, 2011

A Plethora of Presents

Cloth napkins

It's been a busy couple weeks. I spent five days in Minnesota taking care of my niece (15) and nephew (9) in Minnesota, so not much sewing going on. The week previous, I was in a flurry of present-sewing activity. Thankfully, I was able to finish in time for my visit.

For my brother and sister-in-law, I made two-sided cloth napkins (9 of them because that's what I could get out of a yard). They are rectangular and I think they were 12x14 unfinished. The backing is pink cotton shirting. I just stitched them together, turned them, and topstitched them. Easy peasy.

Cloth napkins

I put them in a hostess box from a SewMamaSew tutorial. I didn't have the stiff fusible, so I took a piece of a stiff nonfusible and then attached it to the lining fabric with some strong no-sew webbing.

Boxy pouch

I made this boxy pouch for my brother with the videogame fabric I got from Hawthorne Threads. Some easy-to-follow tutorials here and here.

Boxy Pouch

I lined it with iron-on vinyl in Kona Cactus. It was a bit challenging turning the pouch inside out, but it doesn't matter that it is a wrinkly since it's inside. I was a little worried about the stress on the sides where the pulls are, since bending the vinyl back creates stress on the seam. So, I hand stitched a little bit on the horizontal side seam to reinforce it.

Coasters

These coasters are for a belated Father's Day gift. They were really simple and fast and I think they'll be pretty useful!

Coasters

I made 7 because that's how many I could get out of a strip. I can't remember how big they were unfinished. Maybe 4". I put fusible fleece on the upper fabric, sewed right sides together and turned them right side out and topstitched.

Coasters

I put vinyl Kona Artichoke on the back. Again, working with the iron-on vinyl means the fabric never gets quite ironed out.

I had a little photo snafu and I deleted a couple photos before I uploaded them. So, I don't have a good photo of the Kindle case that I made for my stepmom (actually, I made two because I didn't know which one she would like).

Kindle cover

I used this tutorial to make the above Kindle cover. I like how it folds up so you can read it hands-free. My Kindle is a second generation, so it's a little bigger than the newer ones (which is what my stepmom has), but you get the point here. I added a second elastic at the top of the holder (there's one on the outside that holds the cover closed) to make it more secure. I only had a 1/2 yard of this fabric, so there is a seam across the outside. But I still like it.

Kindle keeper

I also made this simple velcro-closure pouch. I just love that book fabric. Then, I made this tote for my stepmom.

Los Alamos Tote1

It's based on a tote I already have that I use quite a bit. I made a tiny mistake with the handles; I was just so gung-ho on the project that I forgot to attach them at the seam. But I secured them on top of the fabric and I think they'll work out just fine. It's unlined, but it's perfect for the market or the library. While I was home, I couldn't resist visiting Ikea, but I only bought three 1/2 yard cuts of canvas fabric to make a couple more. It may just need an outside pocket. Then it will be perfect!

Finally, I made this leeeeetle zippy wallet from the Noodlehead tutorial for my sister-in-law. I have a photo of the first one I made, but the one I gave my sister-in-law has a clip on the side. It's just big enough to hold a card or two, some cash and some change. And for me, my vanilla Lip Smackers!

Zippy Wallet

And because I love Noodlehead so much (and it's not like I didn't have enough to do already), I also made a wallet from her tutorial. I topstitched the pocket slots, too. Not sure who it will be for, but I think it might need a closure of some sort. But it was pretty easy and so cute!

WalletWallet

Man, I just love Pac Man!

Now I gotta get to work on my Christmas in July bee blocks and the next month o'birthdays. Phew!

Wednesday, July 13, 2011

A Bounty of Fabric

Jennifer Paganelli Honey Child

Here are the Jennifer Paganelli fat quarters of Honey Child that I won from a giveaway sponsored by Swell Cloth on the Gen X Quilters blog.

Jennifer Paganelli Honey Child

Aren't they lovely?!

I also won some Prince Charming from a giveaway at the Miss Print blog, sponsored by the Fat Quarter Shop on June 16th. I waited and waited. I love, love, love Tula's Neptune (and Parisville, my quilt here) and Tula Pink (whose name I just learned is actually Jennifer) mentioned in an interview that the colors of Prince charming are sort of a reinterpretation of Neptune.

I have ordered from FQS many times and the service is awesome and the shipping speedy. So, I had to decide what to do. Should I contact Kaye at the blog or the shop? Or should I just continue to wait? It was a giveaway, after all. A completely gratuitous, free set of fat quarters. I certainly wasn't entitled to them.

But, my desire to get my hands on some Prince Charming took over and I decided to contact FQS on Thursday afternoon, got a reply email right away Thursday night and on Saturday morning...

**Laaaaaaaaaa **(angel choir)

Prince Charming FQs

That is some amazing customer service over there. This set includes 12 of Tula's fabric in the Honey and Olive color stories and three coordinating solids.  Would you like this pack? You can find yours here: Tula Pink's Designer Select Fat Quarter Bundle.

Speaking of great customer service, I recently learned about Michael Miller's mirror ball dot fabric, which is out of print now. There is even a Flickr group from last year that is dedicated to trying to get it reprinted. I wrote to Michael Miller to see if they were considering issuing it again. Not ten minutes later, I had an email from Michael Steiner himself (the Michael in Michael Miller) explaining that they don't plan on reprinting it at this time but they may consider it in the future. Pretty awesome, huh?! (Speaking of Michael Miller, cannot wait for Going Coastal!)

I found a shop that still had some yardage in Clay for an awesome price ($4+ shipping). I bought a yard. It is lovely, but it's a bit peachier than I had anticipated (kinda hard to get an accurate photo with the iridescent dots). Still, I'm thinking about another highbrow hobo, maybe. Not sure.

Highbrow Hobo2
Some people might iron their fabric before posting it. Not me, though :)

So, I have had really great giveaway luck this year (kicking it off with the Block-a-Palooza Sunkissed layer cake I won from Quilt Dad). I haven't quite figured out a good pay-it-forward aspect of this cosmic good luck that's in keeping with the size of my blog (not sure I'm prepared for the traffic a fabric giveaway might inflict on my tiny blog...). Maybe a charity quilt or something.

One giveaway win I'm a bit unsure about is the biggest one - the MBS Progressive Dinner grand prize. I didn't actually receive the whole prize, but I did receive a set of 32 FQs and the book and I am certainly not complaining. I am very grateful. But I am embarrassed to admit that I'm enough of a fabriholic to send an email to Moda asking if shipping had gone awry. (*ducking head, sheepishly*). I haven't heard back, it was worth a shot, though, right?!

In other fabric news, I am in a present-making frenzy. I have four birthday and a belated Father's Day presents to crank out by Saturday. Here are the awesome fabrics I'm working with:

July project fabrics

I ordered the following fabrics from Hawthorne Threads:

Victoria and Albert reproductions

These are Victoria and Albert Museum reproduction prints (and they were on sale!). I just love these colors and the shapes. Unique. The background is definitely a creamy, light beige - the upper fabric is a bit washed out because it's next to the window. I paired the bottles with Kona Artichoke, which seems to be a decent match.

Totally 80's

I love these Totally 80's prints so much! Kona Cactus seems to be a really good match for them. I've been eyeing the tapes print for so long and finally Hawthorne Threads got it back in stock. It's getting to be a hard one to find. Oh the possibilities!! I am definitely inspired!

Hope you are lucky in creation, inspiration, and fabric giveaways!

Sunday, July 10, 2011

Compute This!

Swell Cloth fabric

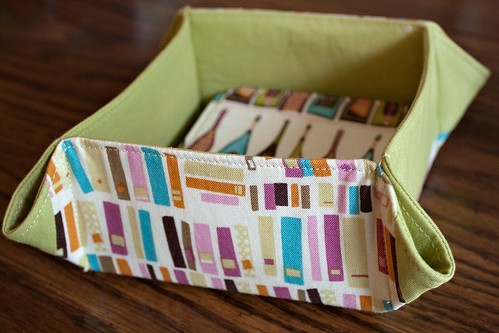
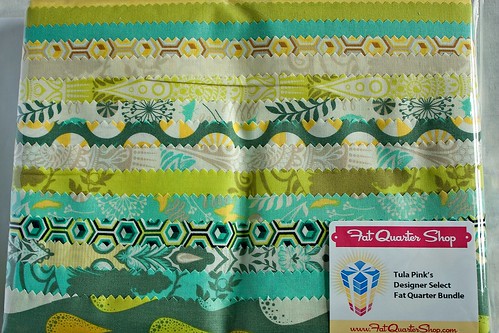
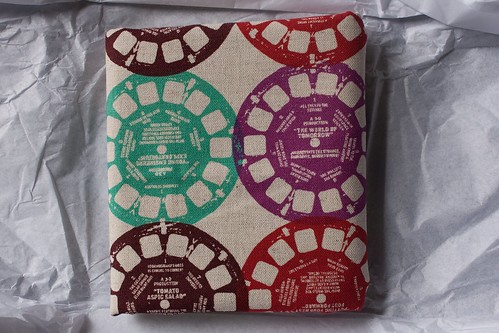
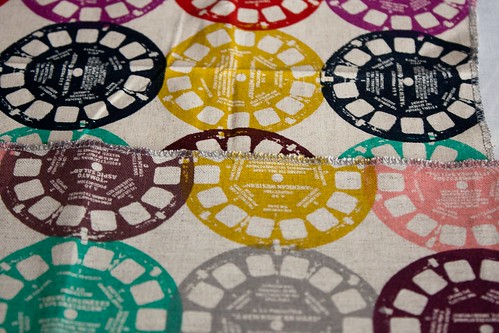
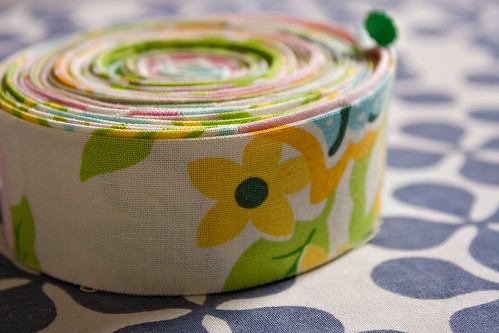
Well, I did it. I cut into my viewfinder material! I did a little deep breathing, gritted my teeth and just did it.

Computer Bag

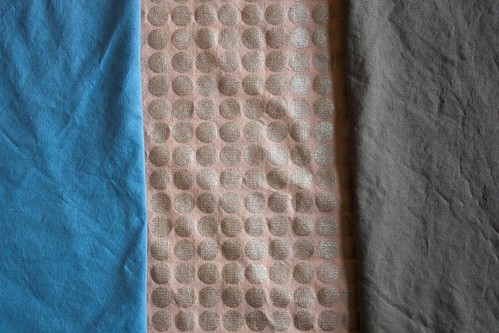
And boy, am I glad I did! I really love this fabric. I had a 15" selvage to selvage chunk of this colorway and a half yard of the pink/grey colorway and I wanted to make sure I could salvage as much as I could from each piece. I often have a little moment right before I cut into a really special piece of fabric (and this is among the more expensive pieces that I have - I'm a bit of a fabric bargain shopper). But once I'm committed, I'm full steam ahead!

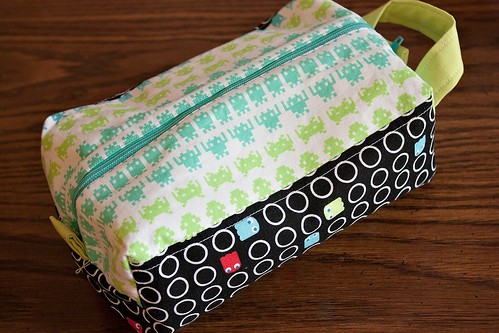
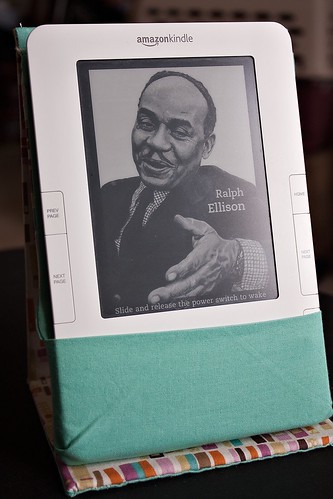
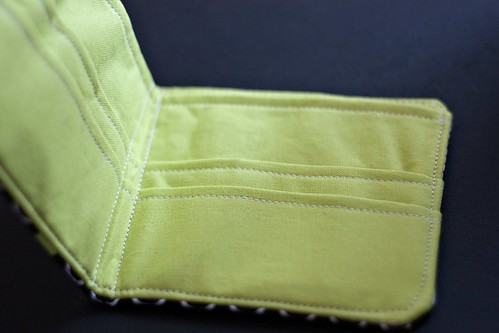
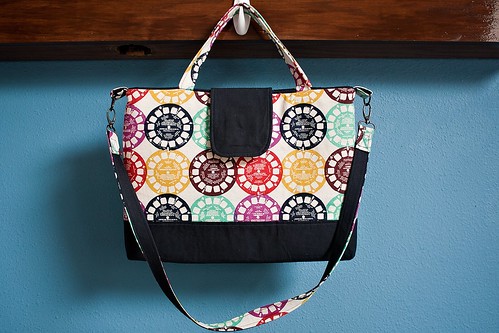
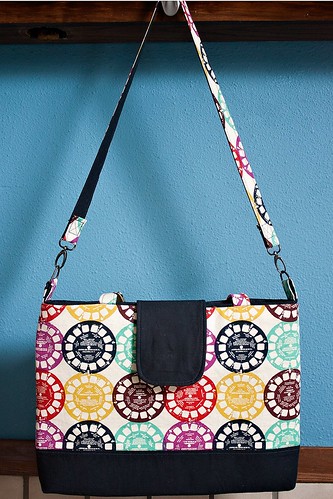
This computer bag is based on 
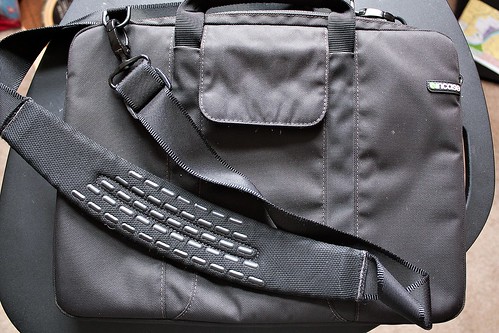
a tutorial from The Mother Huddle. But you know I can't leave well enough alone, so I made a several modifications (I added handles, a flap, a zippered pocket and made a few construction changes). I have a 15" MacBook Pro and I have a neoprene sleeve for it, but I didn't have something with handles that I could carry around on its own. So I used my husband's In Case bag for inspiration, as well.

IMG_2066

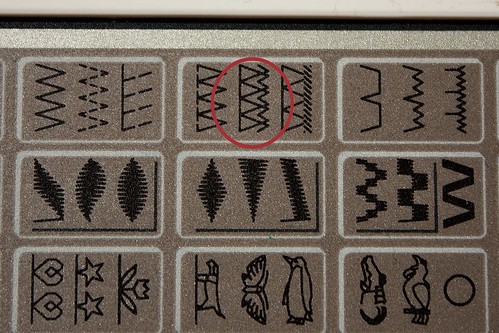
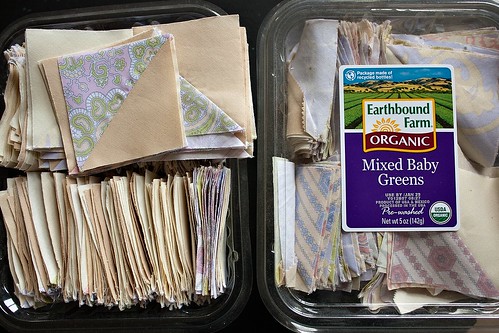
So, let me break down what I did. I generally don't wash fabric for quilts, but I do wash it for bags because I think (perhaps incorrectly) that fusible interfacing adheres better once you get rid of some of the sizing. Because of the linen in the viewfinder fabric I was nervous about losing precious inches to the washing machine, so I overlocked the cut edges before throwing it in. It came out perfect! I don't have a serger but I really love the overlock stitch on my machine and I use it a lot for clothes (I used it again later in the construction process).

Overlock StitchPre-wash overlock/serge
While my fabric was washing and drying, I spent an hour (maybe more...) playing with math and sketches (again, it may have had a tiny bit to do with my hesitance to cut into the fabric). The tutorial had measurements for a Mac, but I based mine off of my own computer and knowing that I only had the 15" strip of focus fabric. (I used this tutorial when calculating my ultimate measurements.) I will say that if you use the tutorial's measurements, you will have a little more room on the sides. My computer fits snugly, but not too snugly.

Computer Bag

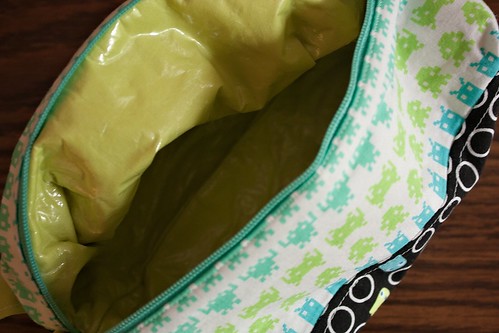
My measurements for the three-panel outer fabrics: 2@8.75"x16" (front and back) and 1@6.5"x16" (bottom). The lining was a bit odd because I originally made it 16"x24.5" (to leave a little lip for a contrast at the top of the bag). But I decided to do the "birthing method" (I heard it called that somewhere; turning it right side out through the bottom of the lining) for this bag instead of the method called for in the tutorial and I needed to have a seam through which to pull the rest of the bag. So, after I had already interfaced the heck out of it, I ended up cutting the lining panel in half and sewing it up as normal.

Computer Bag

I toyed around with the notion of an elastic pocket or accordion type pocket so I could also have my power source attached to the bag. But I couldn't quite make it work with the design I landed on. Actually, the design for the main bag is pretty much the tutorial's design but it went through several iterations (horizontal patterns, all viewfinder, etc.) before I went back to it.

Computer Bag back

I also knew I wanted to add a zippered pocket. I made a bit of a mistake when sewing the first pocket panel on - I sewed too closely to the top and had a tiny, tiny seam allowance left for the other part of the pocket. But it was just enough to make it serviceable.

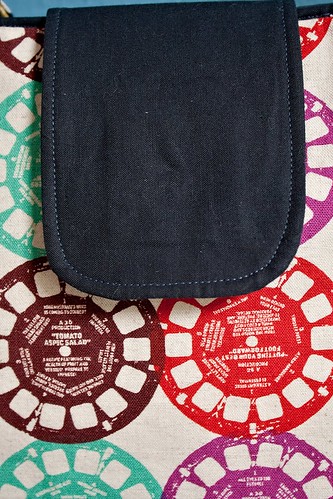
I also added a flap with a magnetic strap for a little more security.

Computer Bag detail

Hardware: I liked the hardware suggested by the tutorial, ergo D-rings and clips. I like how a little hardware really gives bags a nice finished look.

Computer Bag detail

Handles/Strap: I made my straps and handles a little differently than called for the tutorial, which called for the tube method. For the stap I took a 1.5" x WOF piece of patterned fabric and solid fabric, sewed them together along the long side, added scant 1" lightweight woven interfacing to both sides of the seam, folded in the cut sides 1/4" and sandwiched them, topstitching along both sides. I was able to use that whole strip for both the strap and the D-Ring loops. For the handles, I used 2 strips@2.5", folded them in half lengthwise. In the middle, I reinforced the handle with a scant 1"x5" piece of heavy weight fusible stabilizer. Then, I layered the lightweight interfacing on top of that and on the other side, folded in the sides 1/4" and topstitched. The handles can be folded inside the bag, too!

Computer Bag


Interfacing:
 My computer isn't going to be totally safe if it falls to the ground, but I did put some cushioning in there. I used Pellon Fusible Thermolam Plus for the first time. It is similar to fusible fleece but it seems a little denser. I think I remember reading that some of Amy Butler's patterns use Thermolam. I cut it 1/4" smaller than the outer and lining panel. On top of the fleece, I added lightweight woven fusible to the edges of the fabric for the outer and lining pieces.

I'm so excited to have a bag for myself and I even have enough of the viewfinder fabric to make a small zippered pouch!

Thursday, July 7, 2011

Kona WIP 1 and 2

Kona WIP1

I'm making progress. And so far I really like it! The colors are Kona Khaki, Eggplant, and Pepper. Pepper is a very dark blue, almost a blue/black but not as stark as a true black.

I also picked out fabric for Kona WIP2. I have been planning a blue/orange quilt for some time and I think the time has come to give it a go while I'm on involuntary vacation (I work for the State of Minnesota and we are currently shutdown due to a budget dispute).

Kona WIP2

I am not sure about turquoise/aqua colors (there's a little more contrast in the shades than the picture shows). I really like them with the oranges and they certainly add a watery dimension to the blues. My color consultant likes the aqua. I will have to meditate on it as I work on Kona WIP1.

Onwards and upwards!

Tuesday, July 5, 2011

Last Week's Sewing

Block-a-palooza binding
Border cum binding
Happy belated Fourth! Hope you enjoyed the holiday!

Here's what I was up to this past week:

I finally finished the top for my Block-a-Palooza quilt. Really, all I had to do was some seam ripping, sashing, and adding a border.

Block-a-palooza top finished

I'm really happy that I got it done. As I've mentioned before on this quilt along journey, I'm not a huge fan of the way samplers look. But I had so much fun making each of these blocks, concentrating on the colors and different shapes and pieces (just like making the bee blocks). They are far from perfect (and I know the sashing is a bit odd...), but even with the flaws I am really happy looking at them, especially the blocks with a ton of pieces!

I also whipped up some burp cloths for my new niece, whom we met on Sunday. I used this pattern for contoured burp cloths from Cloud 9 Fabrics but I used quilter cotton and t-shirt jersey as Rae suggested in her burp cloth tutorial.

Burp cloths

I really like how they turned out. I have previously made some from Joann's flannel and cloth diapers and they got really pill-y. I made some out of LQS flannel, but I'm not sure how they have faired. Hopefully, these ones will hold up a little better and be just as absorbent.

Burp cloths

The contour really does help it stay on your shoulder.

Burp cloths

And they're so cute! Cute enough to puke on!

I also started a new quilting project (finally!).

Solids WIP

I've had this one in my design book for a while. I have about 220 blocks so far and I'd like to have a hundred more. But we shall see if I get that far.

I've also fallen in love with starch. I don't know if it's kosher in the quilting world, but it is really helpful when working with these blocks that are cut on the bias. I'm also re-pressing hundreds of seams on some 3" half square triangle blocks that have been languishing and the starch has been awesome.

Fat Geese WIP

I tried to use these blocks as leaders and enders, but I had some seam bulk problems, so I thought it would be better to have the seams pressed open. They are destined to become a low-intensity fat geese quilt.

Fat Geese WIP

But this is an ongoing re-pressing project, as I have two salad bins full of squares to re-press!

Fat Geese WIP